Showing posts with label Cooking The Uncooked. Show all posts

Tuesday, June 10, 2008

Do You Know The Donutman?

"Do you know Ginger?", an adorable yet a chubby girl in her kindergarten pinafore asked in a polite manner, while assuring us that she knew Ginger in her life with her convincing expressions.

"Oh well, Ginger... The ale Ginger, my dead Sharpei named Ginger or the human Ginger?", we questioned back sarcastically as response.

"Oh goodness gracious, you know, Ginger! Don't you know who Ginger is?", she fumes while stomping her feet profusely.

"Okay, wait a minute young girl. Let's play this. Knock, knock", we said cheekily.

"Duh, who's there?", she rolled her eyes and that was real sarcastic, so wanna pinch her fat cheeks.

"No! You lead us! You'll start of with that knock knock thingy", we exclaimed impatiently.

"KNOCK KNOCK!", said the chubby lady in a loud voice.

"Who's there?", we questioned back.

"GINGER!", she scowled.

"Ahhh~ Ginger who?", we said in a melancholy tone.

"GINGER THE BREAD MAN!", she backfires in a fierce and high-toned voice, with that annoying glare that she used to give us.


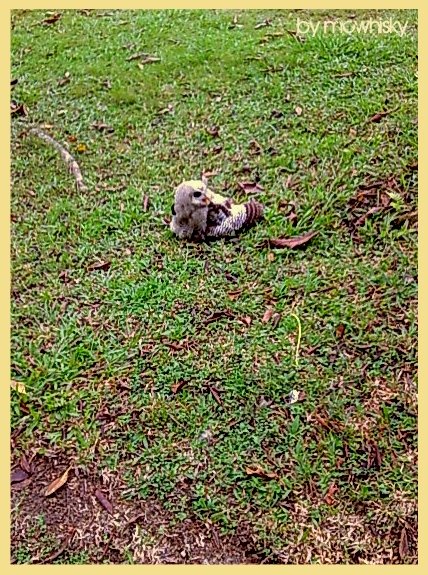
Yes, that glare, like the prosperous owl above (The very tame and photogenic owl was found somewhere near a park, and we were so lucky to get some shots out of this gorgeous fat bird). Boy, that hits us hard to the rock-bottom of our self-esteems. That was a very good one indeed. We have never know kids nowadays are that good at riddles, jokes and knock-knock's. We were embarrassed by how the knock-knock riddle turned out, and ginger the bread man? Oh gosh. That hits us real hard. We should not have suggested knock-knock's at first.


We were not satisfied by how the kid managed to come up with a rather sarcastic answer, which made us in awe, made her stand out within, outshining other kindie kids. But, it was so unethical to run us down publicly with spoken words, just in seconds. In seconds! We wouldn't even mind if it was in the period of an hour or so. Killing our dignity within seconds is just too overrated and so untrue. ;P


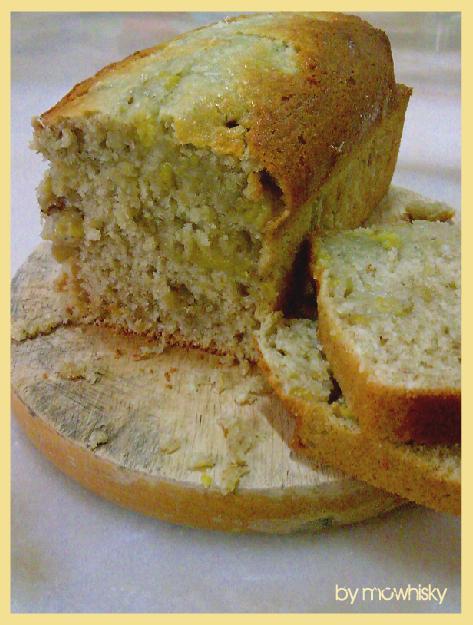
Enough of ginger, the bread man. The word kept popping and wandering in our hollowed minds while we were prepping for a doughnut dough. Mixed feelings and highly possible; the feelings of anger and being embarrassed gradually faded after letting go by releasing our anger on the doughnut dough. Light punches and blows, followed by quick and consistent jabs were thrown onto the poor and innocent doughnut dough. It worked! The tension were released. The dough was doing just fine - no bruises but partly deformed. We then let the dough rise by proofing. After the dough doubles up in size, we proceed to dough-cutting, using a doughnut cutter.


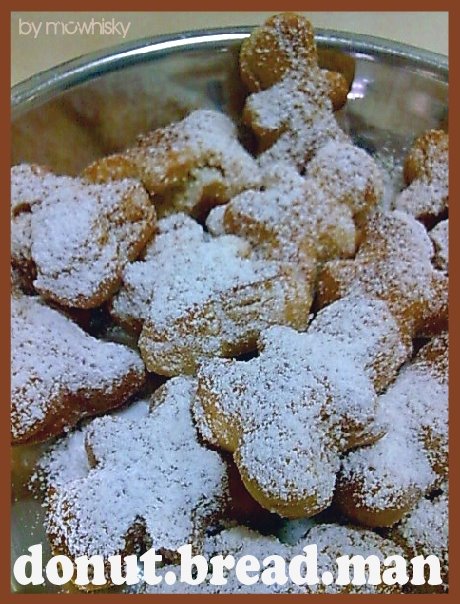
As we were rushing and in a hurry, gingerbread man cookie cutter (pardon us, did we just heard ginger?) was simply used to hasten
things up. We managed to come up with a doughnut shaped gingerbread man. As weird as it sounds, let's put it this way - donutbread man; gingerbread man's blood-related cousin.


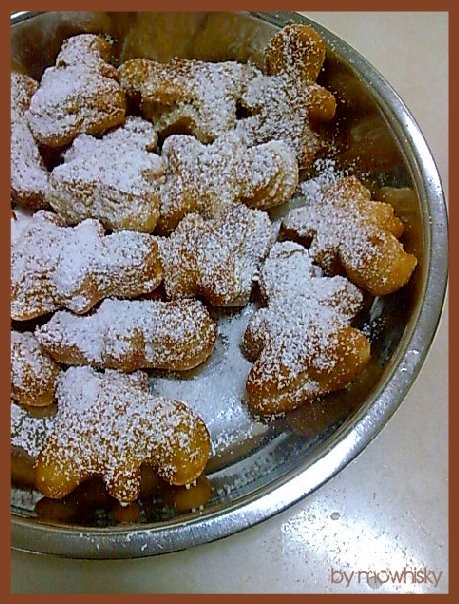
The doughnuts taste just like how doughnuts ought to be. The sticky dough produce a lighter and fluffier bread texture, which is perfect for tea breaks. The dough that was ready to be dipped into a pool of hot oil will be handled gently before it gets into the oil. After frying, the golden brown and tanned donutbread man will be powdered by sifted powdered sugar, and best eaten while it's hot - Ouch!


Donutbread Man


500g plain flour
1-1/2 teaspoon instant yeast
1 cup water
1 teaspoon salt
50g softened margarine
40g sugar
1 medium egg

1. Place all the stated ingredients in a big bowl. Knead till soft dough are formed. Roll dough into a large gigantic ball.
2. Leave the dough in the bowl and cover it with a piece of plastic sheet. Scrutinize the dough, let it rise for about an hour, where you'll see a double sized dough by then.
3. Next, roll dough into the size of +/-1cm thick.
4. Cut the dough with a small gingerbread man cookie cutter and place them onto greased tray. Cover with a plastic sheet.
5. Scrutinize them closely for about 40 minutes. As long as these uncooked doughnuts rise again, they can be cooked just in no time!

6. Heat oil in a deep pan. Fry the doughnuts in the preheated oil till golden brown.
7. Dip the hot doughnuts into a plate of sugar (granulated or caster will do, brown sugar perhaps?). If you prefer coating the doughnuts with royal icing, chocolate or buttercream, or even icing sugar, coat them after cooling them for a few minutes.


Knock, knock,
Who's there?
Donut,
Donut who?
Donut, the bread man.


Sunday, May 11, 2008

Going Bananas Over Bananas


Our evil eyes stare coldly at the almost-ripened bananas on the kitchen counter. We don't fancy almost-ripened ones when it comes to making banana bread or even banana cake, thus, we dump them into the refrigerator to further ripen the bunch of bananas that we have. Fully overripe; that's what we love to have our hands on. The darker and the browner the bananas are, the better the cake turned out to be. Cakes or breads baked using awfully dark brown (the best one were all blacks) and mushy bananas appear to be more good-looking, in terms of more refined banana strands can be seen, which we find it beautiful.


One do still wonder be it banana bread OR banana cake, both were almost the same. Almost, what say you? We can't even differentiate what's the difference and the unlikeliness between these two bakes; the refreshingly sexy and fancy banana cake and its handsome cum down to earth twin brother; the banana bread. Now, that's one shallow and ambiguous comparison to date. Simply, banana bread which is baked in a loaf pan, is in the middle of a bread and a cake texture with a low intensity of pure banana flavor. On the other hand, the banana cake is more to the crumbly side, most of the cakes were pretty-looking and sweet, which kids would love. We love to have both as they were great accompaniments to a hot cuppa.


As for the past week, we rendered into dozens of Cavendish bananas to enjoy the very well-defined banana week. Packed with extra calories and a few extra pounds, we wouldn't mind either since we were then crazy over bananas - especially caramelized bananas and banana milk shakes.

We were thinking, since it was a balmy banana week, participating NQN's Banana Bread Bakeoff Event will be fun and definitely motivating. It can keep track of where all the black bananas have gone to, while sparing us extra reasons to bake more banana breads and even cakes. After the banana week were all over, our bleary red eyes paid off as we were about to post three adapted recipes, hailing from various sources; banana bread with caramelized walnuts and caramel icing from Ma, up-side down banana cake from Women's Weekly, and last but not least, a loaf of simple yet refreshing banana and coconut bread adapted from a local cookbook; which is Delicious Cakes by Amy Heng.


The outcome was a blast-off. We totally had fallen for Ma's not too sweet caramelized walnuts and the moist banana cake itself, and also the upside-down banana cake. As for Ma's banana cake, we were very lucky to stumble upon her very own piece of cookbook - full of comprehensive written notes and recipes that were meant to be the family's favorite. As the bread was moist, soft in texture and pleasant-tasting, it was a definite keeper. As for the not-too-sweet caramel icing, it blended well with the bread as it was a softer icing. The caramelized walnut lends a big help of crunchiness to the entire bread. The banana bread can go with or without the icing and caramelized walnuts, but be sure to take a sip of a just-brewed hot cuppa for the extra umphh.


Ma's B
anana Bread with Caramelized Walnuts and Caramel Icing

For the banana bread:
  • 125g unsalted butter, softened at room temperature
  • 280g caster sugar
  • 2 medium eggs, lightly beaten with a fork
  • 2 cups of mashed overripe bananas
  • 1/3 cup fresh milk (mix with 1 teaspoon of lemon juice or white vinegar and set aside for 10 minutes)
  • 2 cups of all-purpose flour, sifted
  • 1 teaspoon baking soda, sifted
  • pinch of salt
1. Prepare all the ingredients at room temperature. Preheat oven at 175"C or 350"F.
2. Grease and lined parchment paper into a loaf pan; 9x5 inches.
3. In a medium bowl with electric mixer of a whisk attachment, beat butter and sugar for about 3 minutes till light and creamy. While the mixer is still creaming the butter mixture, gradually add in the eggs and continue mixing to avoid curdling.
Add in the mashed bananas and mix till incorporated.
4. In another small bowl, mix sifted flour, baking soda and salt. Set aside. This will be the flour mixture.
5. Fold in the half of the flour mixture into the batter, followed by half of the milk, until combined. Scrape the bowl. Fold in the remaining flour mixture and the remaining milk into the batter. Fold until the batter is smooth.
6. Pour mixture into prepared pan and bring into the preheated oven. Bake for about 30 minutes where the surface of the bread will be golden brown or until a skewer comes out clean when inserted into the middle of the bread.
7. Cool bread in tin for about 5 minutes before turning it onto a wire rack. While cooling, proceed to the icing and caramelized walnuts, which is optional. (recipe below)


For the caramelized walnuts:
  • 1/3 cup water
  • 1/2 cup caster sugar
  • 1 cup walnuts, coarsely chopped
1. Combine the sugar and water in a medium, heavy based saucepan. Stir over low heat until the sugar has dissolved. Stop stirring and let the mixture come to boil. Boil for 10 minutes, occasionally swirling the liquid around the saucepan. When the caramel mixture has turned dark brown, remove from the heat.
2. Quickly mix in the walnuts into the caramel and toss the walnuts until coated evenly. Spoon the caramelized walnuts onto the surface of the cooled banana bread.


For the caramel icing:
  • 1/4 cup whipping cream
  • 1/3 cup brown sugar
1. Combine the sugar and whipping cream in a medium, heavy based saucepan. Stir over low heat until the sugar has dissolved. Stop stirring and let the mixture come to boil. Boil for 2 to 3 minutes. Keep stirring with a wooden spoon, until the mixture had turned golden brown. The mixture will be soft and slightly thick. Remove from heat and stir the icing continuously until warm to touch.
2. Pour the icing onto the bread. Allow to cool.


Caramel and now what? The other banana baked goods winner was the upside-down TOFFEE banana cake from Women's Weekly. Toffee is sure to made us all go happy, as we are caramel and toffee fanatics. With slices of bananas and soft toffee as toppings, it was indeed sinful. Not very rich but still, sinfully tasty.


The cake was not as sweet as we have expected and our helpers convinced us that this upside-down cake is better than any upside-down cake that we have approached. It was very light and fluffy. Slices of bananas were laid onto the surface to enhance the distinctive banana flavor. After the cake was left for days, the top becomes pudding-like texture. So, gobble down everything as it is best eaten on the day it was baked. In this cake, vegetable oil was used instead of cubes of unsalted butter.


Upside-Down Toffee Banana Cake (adapted from Women's Weekly; Best Food Desserts)
  • 1 cup (220g) caster sugar
  • 1 cup (250ml) water
  • 2 medium bananas (400g), sliced thinly
  • 2/3 cup (160ml) vegetable oil
  • 3/4 cup (165g) brown sugar
  • 1 teaspoon vanilla extract
  • 2/3 cup (100g) plain flour
  • 1/3 cup (50g) self-raising flour
  • 2 teaspoons mixed spice (we substituted with 2 teaspoons of cinnamon powder)
  • 1 teaspoon baking soda
  • 1 cup overripe mashed bananas
1. Preheat oven to 180"C. Grease deep 22cm round cake pan; line base with baking paper.
2. Stir caster sugar and the water in a medium saucepan over heat, without boiling, until sugar dissolves; bring to a boil. Boil, uncovered, without stirring, about 10 minutes or until caramel in color. Pour toffee into prepared pan; top with sliced bananas.
3. Combine eggs, oil, brown sugar and extract in a medium bowl. Stir in sifted dry ingredients, then mashed bananas; pour mixture into prepared pan. Bake, uncovered, in preheated oven about 40 minutes. Turn onto wire rack, peel off baking paper; turn cake top-side up. Serve cake warm or at room temperature with thick cream, if desired.


The last banana baked good was the Banana and Coconut Bread, for the ones who like it plain. The bread was not as moist as Ma's Banana Bread. This might be the pure banana bread; drier, less crumbs and denser; a basic recipe from Amy Heng's Delicious Cakes. It was plain and we would like to stress on the importance for a hot cuppa to go along with this bread. Besides, this bread itself calls for corn oil, banana essence and ovalette or emulsifier; a thick light orange gel.


However, alterations were made by adding 1/2 cup of dessicated coconut and 1 cup of 1/2 inch cubed bananas. Cubed bananas were incurred to moisten the bread as we prefer moister ones. Besides, these chunky cubed bananas made good surprises in a loaf. Omit the cubed bananas if you prefer having a simple yet light banana bread. The original recipe do also call for evaporated milk, which lends a pleasant aroma to the bread. We also stick to the original recipe by not substituting the ripe bananas with the overripe ones. It will yield 2 loaves of banana bread though.


Banana and Coconut Bread (adapted from the original recipe of Amy Heng's Banana Bread)
  • 5 eggs
  • 15g ovalette or emulsifier
  • 230g caster sugar
  • 170ml corn oil
  • 230g cake flour, sifted
  • 1 teaspoon double-action baking powder, sifted
  • 250g ripen bananas, mashed
  • 60g evaporated milk
  • 1 teaspoon baking soda, sifted
  • 1 teaspoon banana essence
  • 1/2 cup dessicated coconut
  • 1 cup of 1/2 inch cubed bananas
1. Line and grease two 9 inches rectangular pans.
2. Preheat oven at 180"C.
3. In a mixing bowl, whisk eggs, ovalette and sugar at a high speed until light and fluffy.
4. Gradually beat in the oil, flour and baking powder at low speed until just incorporated.
5. Scrape the sides of the bowl and add in mashed bananas, evaporated milk, baking soda and banana essence. Mix until combined.
6. Fold dessicated coconut and cubed bananas with a wooden spoon or spatula. Pour into two prepared pans. Bake for 55-60 minutes
or until a skewer comes out clean when inserted into the middle of the bread. Cool cake on wire rack before turning onto serving tray.

Happy baking and Happy Ma's Day!


Saturday, May 3, 2008

Rice Krispies : The Rich Or The Delicate?

Rice krispie were some what new to us. Love the cushy popping sound that rice krispie make though. Most of us here do not really enjoy cumbersome procedures and instructions, mainly when it's coming from book recipes. We do think that rice krispie bars are too complicated to be done; the inner soul of a novice baker convinced us that it is. Surprisingly, it took us about an hour plus to get 2 trays of rice krispie bars - proven that rice krispie bars ain't that troublesome. Strolling down one of the aisle of a nearby bakery mart, we were stupefied and dumbfounded when we saw the price tag of a huge pack of rice krispie, let's say 500g in weight for just RM3.80. It was a steal, definitely cheaper than what we have thought. Out of curiosity, we've spent on a pack of it. At least, just if lady luck and the kitchen god aren't with us, the ruined and disastrous rice krispie bars will only cost us a few penny. It is money, but the highs and lows are the one that counts. Toying around with rice krispie bars during bored weekends, what's not to be excited about?


As 500g of plain rice
krispie are considered as abundant compared to most of the recipes we've gotten, we go full force with two different rice krispie recipes for the sake of wiping all of the krispie out of our food cabinet. The first batch of rice krispie dawdled around in the line for Chocolate and Peanut Butter Rice Krispie Bars. It was a pure crowd-pleaser and a definite keeper. Our dead beat faces were all enliven after ONE bite. Chewy, with a perfect blend of peanut butter and chocolate chips, it can't be wrong! It was really good. Hands down, as words can't enlighten how great these krispie bars tasted. Stumbled upon the lord of sugary dessert which is Chocolate and Peanut Butter Rice Krispie Bars recipe from Monkey Eat Food. The original recipe was known that it was from How It All Vegan Cookbook and it can be found from Monkey Eat Food. We altered the recipe a little as we found out that sprinkling the chocolate chips layer by layer will be less messy and the intention for licking the wooden spoon will be less encouraged. In addition, we have added a coat of chocolate frosting on the surface of the rice krispie bars to fulfill our sugar-high pulses.


Chocolate And Peanut Butter Rice Krispie Bars (adapted from How It All Vegan)

  • 1 cup sugar
  • 1 cup corn syrup or brown rice syrup
  • 1 cup creamy peanut butter
  • 6 cups Rice Krispies or puffed rice cereal of your choice
  • 2 cups chocolate chips
  • 125g dark chocolate
  • 2 tablespoons butter
1. In a small saucepan on medium heat, mix together the sugar and syrup until hot and bubbly.


2. Remove from heat and add the peanut butter; stir in together until well mixed.


3. Pour the puffed rice or rice krispies into a large bowl. Stir in the peanut butter mixture and mix together well with a large wooden spoon until combined. The rice krispies will be coated evenly with the peanut butter mixture.


4. Pour half of the mixture into a 9x13-inch or 8x14-inch pan and press flat with the wooden spoon. Sprinkle 1-1/2 cup of chocolate chips. Pour the remaining mixture and press flat with the wooden spoon. Sprinkle the remaining 1/2 cup of chocolate chips. Press flat with wooden spoon so that the rice krispie bars have a leveled surface. Place the rice krispie bar with the pan intact on wire rack to cool while proceeding to the frosting-making.


5. For the frosting, melt the chocolate and butter in a double boiler over barely simmering water, without touching the water. Stir until combined. Quickly pour onto the rice krispie bar. Let cool for 1 hour on wire rack before cutting into squares.


6. Cut into dainty 2-inch blocks with a sharp knife as these bars are super rich. Enjoy!


Next up in line; White Chocolate And Rosewater With Pistachio Rice Krispie Bars. We tried to toy around with the original white chocolate rice krispy bars by infusing rosewater extract into the white chocolate frosting and adding pistachios into the bars itself. Compared to the Chocolate and Peanut Butter Rice Krispie Bars, the white chocolate bar is more crunchy and less chewy. The pistachio nuts were lightly toasted to garner a fresher-tasting bar. Pairing up with the rosewater infused white chocolate frosting, it's a great combo to play with. Snapping off the white chocolate bar while digesting the previous chocolate bar were unforgettable, as the white chocolate bar is pleasant-tasting and light in flavor, while the chocolate bar is super rich. Yin and yang - perfect balance.


White Chocolate And Rosewater With Pistachio Rice Krispie Bars
  • 3/4 cup (180 ml) sweetened condensed milk
  • 280g (10 oz) white chocolate, chopped finely
  • 2 tablespoons butter, softened at room temperature
  • 2 cups rice krispies
  • 1 cup pistachios, lightly toasted and coarsely chopped
  • 1/2 teaspoon rosewater extract
  • 125g (4 oz) extra white chocolate, chopped finely
1. Grease a 9x9 inch square pan with vegetable oil.
2. Place condensed milk into a medium saucepan. Heat over low heat for 5 minutes, stirring continuously. Stir in the 280g white chocolate and butter, keep stirring until the mixture is smooth and incorporated. Remove from heat.


3. Mix the rice krispies and pistachios in a large bowl. Pour the white chocolate mixture into the rice krispies and pistachios. Mix with a wooden spoon until the rice krispies are coated evenly with the white chocolate mixture. Spoon the mixture into the prepared pan. Level the surface by using the wooden spoon to flatten the surface. Set aside on a wire rack.


4. For the frosting, melt the 125g white chocolate in a double boiler over barely simmering water, without touching the water. Stir until smooth. Add the rosewater extract into the melted white chocolate. Pour onto the rice krispie bar. Let cool and let the white chocolate to set for about 30 minutes on wire rack before cutting into squares. It makes about 20 squares. Happy baking Krispies!


Friday, May 2, 2008

The Apple Pie Fantasy

Have been tempted into baking pies lately, and we thought, why not an apple pie since apples and pie tarts are one perfect match made from the worthy dessert heaven. We WILL definitely starve the whole day just to grab a bite out of the to-die-for apple pie. That will probably be one halcyon moment that we would love to have. Our ideal and perfect apple pie, which is still no where to be found, is one with loads of medium cooked apples and caramel filling, encased by a very buttery layer of flaky crust (of fat lard), topped with a streusel-like flavored cinnamon top-crust. Last but not least, home-churned creamy vanilla ice cream to top the good-looking hot pie; that's basically a great apple pie to die for. If that is what a good ole apple pie ought to be, perhaps, opting for Emeril Lagasse's recipe will do us something good. After googling and checking around in Emeril's cookbook, it seems that we must spend on dozens of granny smith's apples in order to try Emeril's variations of apple pie. The notable celebrity chef has came up with recipes like Big Apple Pie, Apple-Raspberry Crisp with Oat Topping and also, the simple Apple Pie with Lard Crust. Definitely will work our hands on Emeril's apple pie soon, as the recipe's name itself sounded tempting.


As for our previous attempt on an apple pie recipe, we hooked up with the Apple-Caramel Crumb Pie from a book titled 500 pies & tarts, written by Rebecca Baugniet, from PageOne. Love the book as we are given variety of alternatives and ideas to revamp and alter the original recipe. We garnered juicy red apples and a tub of finely milled cinnamon from a nearby mart for the luscious apple pie. Rebecca Baugniet's apple-caramel crumb pie consists of thick chunky red apples coated in caramel and topped with streusel-crumbs. Before starting off with the apples, the crust were kneaded and lined onto a 9.5 inches of pie dish. We opted for two pie dishes; measuring at 5 inches each, because we were dying to see how a flat surface and crumbly surface of an apple pie would affect the appearance of the entire apple-caramel crumb pie.


Apple-Caramel Crumb Pie (adapted from Rebecca Baugniet, of 500 Pie & Tarts)
For the basic crust (for a 9.5 inch pie dish)
  • 140g (5 oz) plain flour (sifted)
  • Pinch of salt
  • 60g (2 oz) cold vegetable shortening (cut into 1-inch cubes)
  • 60g (2 oz) cold unsalted butter (cut into 1-inch cubes)
  • 1/2 large egg (lightly beaten)
  • 1 teaspoon white vinegar
  • 1 tablespoon ice-cold water
  • Extra flour to flour surface
  • One 9.5 inch (24 cm)pie dish
  • Rolling pin
1. Combine the flour and salt in a large mixing bowl. Add the vegetable shortening and butter to the flour mixture. Using a pastry blender or two knives in a criss-crossing motion, blend the butter and shortening into the flour mixture until it has a consistency of damp sand, with a few pea-sized pieces of butter and shortening remaining.
2. In a small bowl, beat the egg with the vinegar and water
either with a fork or a wire whisk. Slowly pour egg mixture over the flour, stirring only the mixture is moist. The dough should stick together and be able to hold the form of a ball.
3. Wrap the dough in a plastic wrap and smoothen the ball of dough with a rolling pin so it forms a flat disc that fills the corners of the plastic wrap. Chill in the refrigerator for a minimum of half an hour.(If it has been chilled for a long time, it may need to soften slightly by placing it in a room temperature before use.)
4. To roll out the crust, unwrap plastic and place on a lightly floured surface. Roll the dough from the centre of the disc to the edge, until the crust is the desired thickness. (usually 1/8 inch or 3mm in thickness.) If the dough is sticking on the rolling pin, try placing a sheet of plastic wrap over it and then rolling it out. Remove the plastic wrap and transfer the crust into the 9.5 inch pie dish by rolling it onto the rolling pin and then positioning it over the pie dish. If the crust is sticking to the rolling surface, carefully separate it by sliding a sharp knife or metal spatula between the crust and the rolling surface. Carefully press the dough into the pie dish. If any cracks appear during the transfer, use lightly floured fingers to push the seams back together.
5. Crimp the edge decoratively and chill in the refrigerator.


For the fillings
  • 8 cooking apples (we used red and juicy apples, apples are peeled, cored and sliced into 1 inch cubes)
  • 35g (1-1/4 oz) flour
  • 280g (10 oz) granulated sugar
  • 60ml (4 tablespoon) water
  • 3 tablespoon unsalted butter, softened at room temperature
  • 2 tablespoon water, extra
1. Preheat the oven to 190"C or 375"F.


2. Place the apple cubes in a large bowl with the flour. Toss the flour and apple cubes to coat evenly. Set aside.


3. Combine the granulated sugar and 4 tablespoons of water in a medium, heavy-based saucepan. Stir over low heat until the sugar has dissolved. Stop stirring and let the mixture come to the boil. Boil for 10 minutes, occasionally swirling the liquid around the saucepan. When the caramel mixture has turned dark brown, remove from the heat. (We've burnt our caramel mixture and the outcome was the full flavor of bitterness. Hence, before the mixture turns into dark amber, quickly remove from heat and keep swirling the liquid around the pan. The mixture will slowly turns into amber while undergoing the process of cooling off.)


4. Warning: Overcooking caramel mixture will result in tough and hard caramel candy when the caramel mixture cools off to room temperature.
5. After cooling the caramel mixture for a few minutes, add in 3 tablespoons of unsalted butter and the extra 2 tablespoons of butter; swirl the liquid and combine. Return to the heat and stir until smooth. Pour the caramel over the apples and toss with metal spatula to coat evenly. Set aside for 10 minutes, while the apples release its juices.


For the streusel topping
  • 100g (3-1/2 oz) plain flour
  • 55g (2 oz) light brown sugar
  • 1/2 teaspoon cinnamon (the original recipe calls for 1/2 tsp, but we've choose to have 1 tsp instead)
  • pinch of nutmeg
  • pinch of salt
  • 6 tablespoon unsalted butter, softened at room temperature
1. To prepare topping, combine the flour, brown sugar, cinnamon, nutmeg and salt in a medium bowl.
2. Using your fingers, rub the butter into the flour mixture until large clumps form. Set aside.


To assemble

1. To assemble the pie, remove the crust from the refrigerator.


2. Spoon the caramel-apple mixture into the pie crust.


3. Sprinkle the streusel topping or crumble over the apples. You can also smoothen the streusel out (picture on the left) if you prefer over the sprinkling method (picture on the right). We are quite fickle-minded. Thus, we chooses the smoothen and sprinkling method since we have 2 mini apple pies.


4. Bake the pie for 1 hour or until the apples are soft and the crumb topping is golden brown. Transfer to a wire rack to cool.


The apple-caramel crumb pie is best served with a scoop of home-churned pure vanilla ice cream, which equals perfecto. The streusel topping was so good as it's crunchy and sweet, filled with a hint of cinnamon. The filling - the caramel lends a great distinctive flavor to the not-too-soft and juicy apples, which blends in well just fine. The crust was not as flaky as what we have expected for; it was a bit to the moist side. One can gobble down the entire apple pie from the top to the bottom of the crust as the caramel and the streusel topping were addictive. The quest for the hunt of a perfect apple pie is still on the run. Emeril Lagasse's will be next!


Friday, October 5, 2007

The Topless Tiramisu

The family's current obsession is the homemade sambal. A friend of Pa, who opens up a restaurant, shop, whatever it is in Serdang, serves great luscious sambal dishes. Ranging from seafoods to veggies. As their sambals were addictive and delish, it was not surprising that he has been selling buckets of it; just for a sum of RM10. The sambal were sweet and best of all, loads of dried prawns. Very very fattening and high in calories.


We found out that the sambal was best served together with coconuts and glutinous rice. Hence, we were then hooked up with the Grilled Glutinous Rice With Sambal. Or shall we say this in Bahasa Melayu; which is Pulut Panggang.


Helpers came in to pluck, wash, cut and dry the fresh banana leaves, taken from the graveyard nearby. Okay, we're not that daring. They plucked it somewhere though. Ma helped too, as this is her main yet brilliant idea. We would love to use the banana leaves to wrap up the glutinous rice but we still prefer using the aluminium foil as it doesn't absorb oil and is more convenient. Ma insists that the banana leaves is a better choice to picked as it basically had a sweet and fresh aroma which will heightens the flavor of the glutinous rice while protecting the rice itself from direct heat. And boy, it was so true.


As for the filling, which is a combination of brown sugar, fresh grated coconut and sambals, it blends well together and tasted good. Recipe as follows;


Grilled Glutinous Rice With Sambal

Glutinous Rice;
500g glutinous rice
3 cups of drinking water
1 grated coconut
1 teaspoon salt
Some oil, for the use of brushing during grilling
Approximate 6 banana leaves

1. Wash the banana leaves with boiling water to eliminate contamination and dirts. Pat dry it with a clean cloth. Cut the leaves into squares of 15cm long.
2. Soak the glutinous rice into 2 cups of water for an hour or so. Set aside.
3. Add 1 cup of water into the freshly grated coconut. Squeeze out the coconut milk or santan with a cheesecloth. This will probably yield 1-1/2 cups of coconut milk. Set aside.
4. After an hour or so, drain the glutinous rice. Combine the glutinous rice with the coconut milk and salt. Scoop onto a rectangular baking tray or stainless steel tray. Bring to steam until cooked. This will take about 20-25 minutes. Do not overcooked because the rice will turn soft and sticky.
5. Once cooked, set aside to cool completely.


Fillings;
2 tablespoon cooking oil
1/2 cup young grated coconut

2 tablespoon brown sugar
1 cup of ready made sambal
1 teaspoon salt

1. Heat cooking oil on a pan on low heat. Add in the coconut and brown sugar and fry.
2. Mix in sambal and salt. Fry and mix until well combined, takes approximately 5 minutes on low heat.
3. Set aside to cool.


Assembling;
1. Get the banana leaves, glutinous rice and fillings nearby so it becomes more handy and convenient. Place 3 tablespoons of glutinous rice onto the banana leave. Spread and flatten the glutinous rice by pressing the rice with the other side of the banana leave. The rice will look like flattened, and as large as 8x8cm.


2. Then, place a tablespoonful or maybe even more fillings onto the rice. Lined the fillings on one side of the rice. Hold two ends of the banana leaves and press lightly. Open up the banana leave and place some glutinous rice to cover both ends. Hold two ends of banana leave and press lightly on the top and sides of the rice. It will look like the shot above.


3. Roll the banana leave like the shot above. Secure the two ends with a stapler. Repeat procedures until the ingredients are wiped out clean!


4. Then, place each of the wrapped up glutinous rice onto a baking tray. Preheat oven on 150''C. Brush with some cooking oil on its body. Bake for 5 minutes. Then, turn the rolls on the other side. Bake for another 5-8 minutes. Serve while it's hot. =}


On the main topic of the post, we, basically had made a topless cake for Uncle Phill's 51st birthday. It was Pa's idea for having a Golf Course Tiramisu Cake with the obvious theme of; golf and turfs, for his recuperated brother. Uncle Phill is recovering from his bypass surgery and we were blessed that he is in the pink of health now.


We laid our paws and hands onto the cake, be it decorating or stacking up sky-high cakes, on the day before his birthday. We've found out that the sponges are lack of coffee aroma and taste though heaps of tablespoonfuls of instant coffee powder and coffee emulco have been forced to blend in with the former vanilla batter. More sachets of instant coffee were used just for the sponges.


While the sponges was then sent to the preheated oven for baking, we chop the dark cooking chocolate into chunky thin films, prepare the coffee syrup and most importantly, beat up the sponge fingers batter. The sponge fingers were devastating, in terms of its shape. It looks like dried fawn baby corals from far. Nevertheless, it tasted like a real sponge finger. =)


Once the baking is done, the coffee sponges and sponge fingers were cooled on a wire rack. We slice the coffee sponge into 3 slices since we opt for a tall cake. The first slice were laid onto the cake board, followed by brushing the coffee sponge with coffee syrup, sprinkling chunks of thin-filmed chocolate chunks and arranging the dipped-into-coffee-syrup sponge fingers onto the first cake sponge.


Next. we poured in a generous amount of coffee whipped cream, this is followed by the yummy mascarpone cheese mixture. We find that a single colored cream is dull and bored, so, we tried to go for two tones; the coffee whipped cream was light brown in color while on the other hand, the cheesy mixture was pale yellow.


After assembling the sky-high cake, it was then covered with tasteless whipped whipping cream. Then, the watery chocolate ganache was the next thing for us to fiddled with. Melting the ganache was easy. But identifying the right consistency of the ganache was way harder than we've thought. The outcome was B-okay. It looked smoother on the top relatively with the sides.


During chilling the whole cake in the refrigerator, we land our paws and hands onto the edible golf balls. Rocher's were used since it is large enough to portray golf balls.


By then, we flattened the white sugarpastes with the roller and wrap it around the Rocher's. Disposable gloves were used as we were too afraid that the cost of paying off doctors' bills exceeds the cost of the cake. To look more like a golf ball, tiny holes were crafted.


Next, we molded the flagpole with the number 51 written on the flag. The flag was made out of sugarpaste as well, while the pole was a wooden chopstick. The crafted sugarpastes were placed into a container and it will be used to decorate the cake on the day it was cut.


We moved on with the artificial turf.
And we were speechless when it comes to THAT artificial green turf.


Rather than kneading a green fondant to portray the turf, we opt for the green ganache. We mixed in too much of the whipping cream into the melted white chocolate during the boiling session runs. It looked uber slimy and poisonous. Very toxic-looking. Here comes the ugly. Blame Fatass's instinct!


Lastly, the piping session. We prefer piping these words in non-italic fonts as our cursive were not that pretty to the eye. And yeah, we omitted 'Uncle' as this is part of Pa's gift. He pays, we bake! ;)


As for the cake itself, it was real sky-high tall. It tasted not too bitter and not that sweet either. The mascarpone cheese was the best part.
Oh boy, here comes the naked truth, most of them preferred eating the cake than the green slime. Hence, the cake go naked without its coat. Well, one word; topless.


The picture above; the cake's eye view. Despite of the green ugly watery slime, we were happy with the end result though the decorations turned out ugly. One shoutout before this paw-printed post ends, Happy Buttday Uncle Phill! =)