Showing posts with label Cheesecakes. Show all posts

Wednesday, June 4, 2008

Easy Breezy Chilled Lemon Cheesecake

After rounds of bake sale which is mostly baked cheesecakes, we managed to steal time and came up with a chilled cheesecake (no baking/oven involved). As for the bake sales, we are now planning to venture into online bake sales, which is something we have planned months ago. To jump start the venture, we are now happily baking cakes, cheesecakes and tortes for try-outs besides than prep-ing the ready-made baked goods for a cheap photoshoot. May things go well, considering that we're great procrastinators.
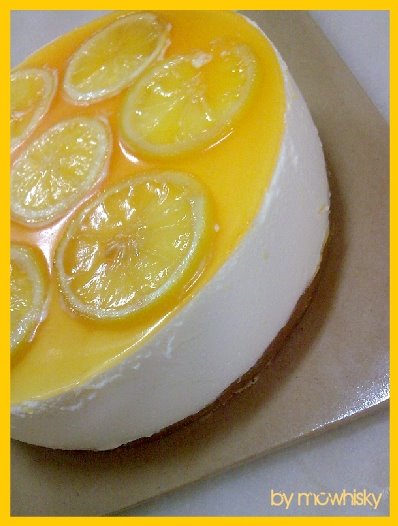


As of the chilled cheesecake, we went back to the basics. How about a chilled lemon cheesecake, something simple and flavorful, we reckon? Speaking of the truth, we have always been alienating chilled cheesecakes especially the plain ones, as we find it rather disgusting due to the uninviting aroma of gelatine - think of liquid glue. Things are different when there are more flavorsome and appealing aroma that will overcome the gelatinous smell or best yet, empower the entire chilled cheesecake.


Since our helpers and the kids can be categorized as ardent lemon lovers, why not a chilled cheesecake flavored lemon? Though we would love to have a green tea infused chilled cheesecake at first. At least, the chilled lemon cheesecake will be wiped off clean from the serving plate just in 2 days compared to the green tea, thanks to the natural citrus flavor in lemons. Like how democratic countries worked, the majority wins. Green tea cheesecake will only cost us more leftovers and extra pounds as the intensified ones tasted rather bitter and smelt grassy.


The chilled lemon cheesecake tasted not as jelly-ish and gooey as we have already stereotyped on most chilled cheesecakes. The lemon flavor was just right, identifiable flavor which is not intensified. One of my helper, which is an even straight arrow person, claimed that it was a creamy cheesecake, and ended with a but. But. Here goes the usual but from her, which sometimes prickle us off. And that is what we wanted to hear, because there is always a room for improvement.


Pleased, and at the same time, confused, she mumbles as she was spooning the chilled cheesecake away from her serving bowl. Standing still impatiently as we waited for her to finish half of the serving slice, we stared foolishly at the sliced-up cheesecake. What is wrong with the chilled baby? Minds pondered. It's either the gelatine cum glue-ish aroma, or it might be the coarsely chopped lemon zests, we thought for awhile. We soon stared strangely back at her; one of our helper and asked for unravel reviews that she had planned to give us. "The lemon aroma was there, but I can hardly taste it".
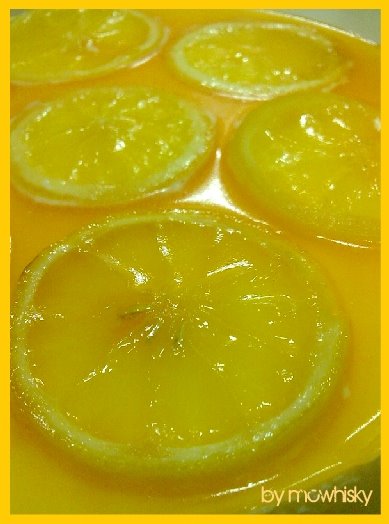


That's it! The lack of lemon juice. Which brings us to a more subtle lemony cheesecake. It was quenchable and creamy, just like how texture of mousses are, with a hint of cream cheese. We doubled the digestive crust for the extra crunch, as to blend in with the mousse-like cheesecake. The topping were made out of lemon juice, water, gelatine, a tiny bit of sugar and yellow coloring - a jellified layer which looked pleasant and tempting on the chilled cheesecake.
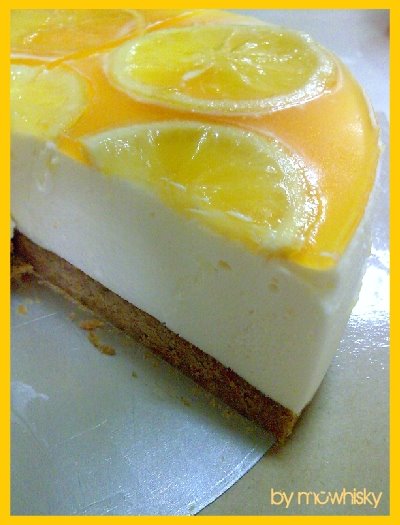


Before the jellified layer was set, the arrangement of sliced lemon were aligned decoratively onto the surface of the cheesecake. The sliced lemon were somehow too sour and hard for human consumption. If there's another quickie to be done the next time, we will definitely forgo the lemon slices though the chilled lemon cheesecake looked simply divine with it.


Chilled Lemon Cheesecake

For the cheesecake:
300g digestive biscuit (we used McVities)
150g butter, melted
250g Philadelphia cream cheese, thawed at room temperature
1 egg yolk
1 egg white
80g caster sugar
1-1/2 tablespoon gelatine powder
3 tablespoon water
3 tablespoon lemon juice (we used 2-1/2 tablespoons of lemon juice, and thus the subtle cheesecake)
1 tablespoon lemon zest, finely grated
225g whipping cream (measured at 225g before whipping, whipped until firm peaks, let chilled)

1. Finely crushed biscuits - either with a rolling pin or a blender with sharp blades. Combine finely crushed biscuits with melted butter. Press into the base of a 8 inch round springform cake pan.
2. Using electric mixer, in a bowl, beat cream cheese until creamy and smooth. Scrape the sides of the bowl. Add in egg yolk and sugar. Beat until well combined. Set aside.
3. Mix gelatine with water in a small bowl. Stand the bowl in hot water until gelatine has dissolved (the mixture will look ooey gooey and sticky!)
4. Add the gelatine mixture into the cheese mixture. Mix well. Add in lemon juice and lemon zest. Mix until well combined.
5. Mix in whipped cream with a rubber spatula.
6. Beat egg whites until firm peaks formed. Fold gently into cheese mixture with a rubber spatula until well combined.
7. Pour mixture into prepared pan. Chill for about 2 hours before proceeding to the topping.


For the jelly topping:
1 teaspoon lemon juice
2 teaspoon caster sugar
250g water
2 teaspoon gelatine powder

1. Mix all the ingredients above. Boil on a saucepan over low heat till sugar and gelatine powder dissolves. Remove from heat and let cool until slightly warm.
2. Pour onto cheesecake. Put into fridge and let to set. Happy baking!


Some blur poochie shots (dated months back) to indulged in. There's a huge difference in photo editing, which is pretty bad. Bear with us. ;)


A grown-up and untrimmed Miniature Schnauzer, with pepper coat.


Months-old young Miniature Schnauzer, yawning continuously during a cat nap.


A young Beagle posing macholy.


Beagle Pose.


Last shot of the young Beagle.
Enjoy! ;)


Monday, June 2, 2008

Banana + Toffee + Pie = Go Figure ;)

Lo' and behold, our most unforgettable yet favorable sum of all; banana + toffee. You need to add, and please, do not subtract for the sake of the quote 'live to eat' in order to get the exact jargon that is implied in here. Now, do the math. Tell us, what can you conclude with the unresolved stated sum? A rather positive answer which we all would mostly agree and love to have during sugar high weekends? Or was it a negative account? You be the judge. It was decades ago since this combo flavor was invented; the bananas and the toffees. Partly dumb, we have always mistaken caramel for toffee and toffee for butterscotch, vice versa. Ever since we laid our eyes on the Toffee Sundae from McDonalds which has a blend of bananas and toffee sauce, we knew that there's no point of return. We need TOFFEE and BANANAS for brunch! And something tarty too!


So, let's settle down with the very delish mathematic equation;
  • Banana + toffee = Ban(offee) = Banoffi
  • Banana + toffee + pie = Banoffi Pie


That does make real sense. Banana and toffee, which will be called as one; Banoffi, when merging occurs. In case, one may wonder, who is the mastermind behind this particular heavenly creation with the luscious perfect combo? It is absolutely a bullseye, really did hit the nail on the head. The humble and generous man who has nailed the divine-looking Banoffi Pie was Ian Dowding, the man who we have no doubts that he's in the D.T.E category. D.T.E; which ambiguously stands for down to earth.


It was known that the the very first Banoffi Pie was served at The Hungry Monk in Jevington, East Sussex during the year 1972, and that was baby Banoffi's birthplace. From other sources that we found in the world wide web, it stated that the banoffi pie recipe was devised by Ian Dowding and Nigel MacKenzie.


From the article titled "I invented Banoffi Pie" by Ian Dowding, from July 2007's Reader's Digest, he said it is her sister who told him over the phone on the steps to making soft toffee by boiling a can of unopened condensed milk in water for several hours. From there, he resurrects Rusell's; Blum's Coffee Toffee Pie. With Nigel MacKenzie, they were on the hunt for a newer dimension of the toffee pie, trying out from apples to mandarins. They knew they had cracked the secret code when bananas were used.
Thus, the invention and the crown.


We boiled around 3 cans of condensed milk for the toffees too, with the aid of Ian Dowding's Banoffi Pie recipe. The first can didn't make it (shot above). It was just too watery and light in presence, thanks to the young minds involved; who can't wait too much longer and claimed that they should go on with the can opener. The verdict; that is just so not the toffee that we wanted because the recipe has assured us that the consistency of the toffee will be something spreadable.
We boiled for the extra 2 hours and things flowed smoothly thereafter. Lumpy and spreadable toffee in cans! Here's the way how the boiling method works, hailed from Ian Dowding's website.


Toffee (by Ian Dowding, from http://www.iandowding.co.uk/)
Ian Dowding: "Over the years I have become increasingly concerned about the danger of boiling cans of condensed milk. There is no danger of them exploding unless the water in the saucepan boils dry. If this does happen the result is terrifying and can scald anyone close to it. It has happened to me once and that was enough. Because I now teach and demonstrate a lot I like to make sure my instructions are safe so I have devised this method."

1. Find a deep saucepan or casserole that will go in the oven.
2. Put into it as many tins as will fit. (THE TINS MUST BE UNOPENED). It worth doing several at a time to save on power.
3. Cover the tins with water and bring to the boil.
4. Cover with a lid and transfer to the oven set to gas mark 1 / 140 C (less for fan assisted).
5. Cook for 3 ½ hours.
6. This way there is no danger of the water boiling dry and being in a more controlled temperature you get a more consistent result.
7. Lift the cans from the water, cool and store.
8. An unusual bonus comes from storing these tins over a period. After some months sugar crystals begin to form in the toffee and you get crunchy banoffi - mmmmm.


Banoffi Pie
(by Ian Dowding, from http://www.iandowding.co.uk/)
You will need a 10 x 1½ inch (deep) loose bottomed flan tin
Oven temp: 180 C / gas mark 4

For the pastry:
250g / 9 oz plain flour
25g / 1 oz icing sugar
125g / 4½ oz butter
1 egg and 1 egg yolk

1. Place the flour and sugar in a bowl, cut the butter into cubes and then rub it in to the flour / sugar until it resembles fine bread crumbs. Work in the egg to form a paste.
2. Chill for half an hour then roll out to the thickness of a pound coin and line the flan tin.

3. Prick the base, line with parchment paper and weigh down with dry beans (we go full force with grains of rice)
4. Cook for fifteen minutes then remove the beans and paper.
5. Put the pastry case back into the oven and cook until it is evenly golden.
6. Remove from the oven and cool.

To assemble:
1 ½ tins of banoffi toffee (see note below on boiling the tins or click here)
5-6 ripe bananas
425 ml / ¾ pint of double cream
1 teaspoon of instant coffee
1 dessertspoon of caster sugar
A pinch of ground coffee

1. Carefully spread the toffee over the pastry base.
2. Peel and split the bananas lengthways and arrange them on top of the toffee, (see how they fit the curve of the pastry - that’s why God made bananas curved).
3. Whip the cream with the instant coffee (if they are granules they will dissolve as you whip the cream) and the sugar until it just holds its shape - take care not to over whip it.
4. Spread the cream over the bananas right up to the pastry edge then sprinkle sparingly with the ground coffee.
5. If you are not serving it immediately cover first with some baking parchment or greaseproof paper directly onto the cream and trim the edges then wrap in cling film.
6. It does not lend itself to being frozen.

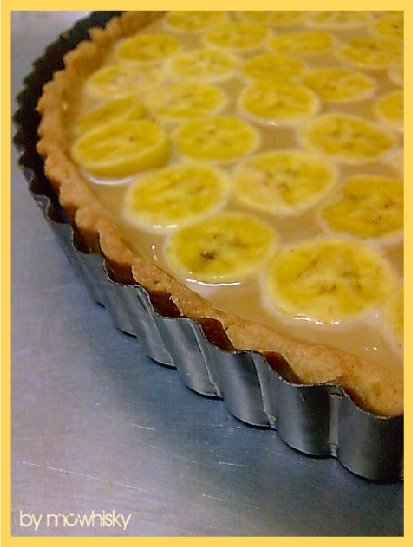
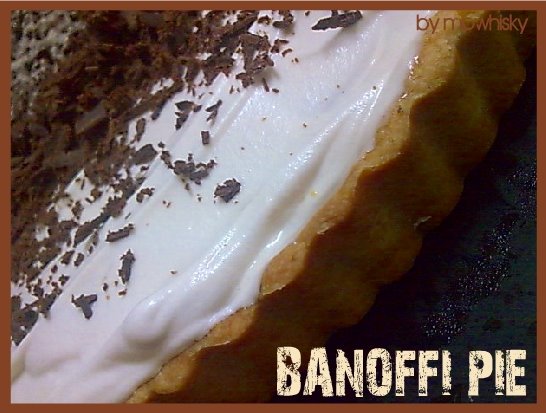
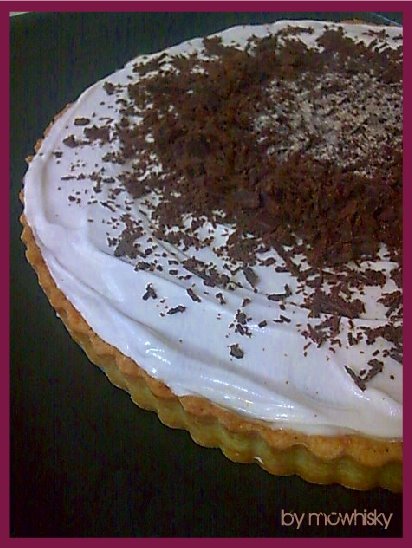
The final outcome was a blast. Bananas will never (ever) go wrong with toffees. Speaking of the tart which is also known as the pastry itself, it remains its tartness though left overnight in the ice-cold refrigerator. It was slightly crunchy and dry, which blends in well with the fluffy yet pillowy coffee cream. The toffee was the sublime of the grand pie. This is definitely a keeper, the only thing that bugs us out is toffee-making, which takes time. But it was worth the time-consumption, as we are all toffee's die-hard fans. Divine and delicious, enough said. =)


The very last month, we hooked up with The Loaf's public favourites; U Hu! Hu! Cheesecakes. The cheesecakes were the latest sensation from Japan, and these lovely babies are now our latest BFFs. Ehem, doughnuts, cupcakes, anyone?!


It was worth buying, since we don't really go for wholesome cheesecakes. Light ones will just do more than enough. Each costs us RM5, and by purchasing 6 cheesecakes, you will only be paying for the price of RM25. Let's just put it this way, buy 5 free 1.


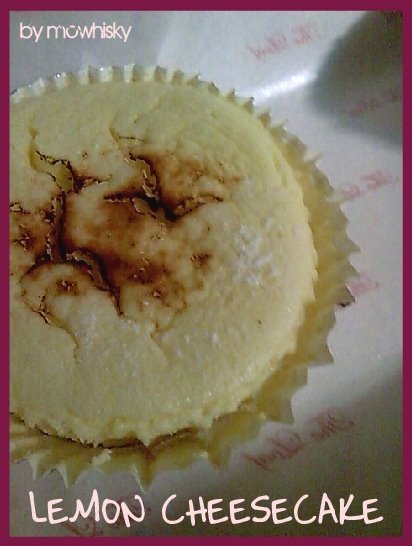
It was not as cheesy as we've expected, it tasted more like a light and fluffy cheese souffle which melts in your mouth. Something people would go for as refreshments, okay, maybe it's just us. We wanted more, but our bulging belly stopped us spiritually. We ordered 3 of the wide-range cheesecakes.


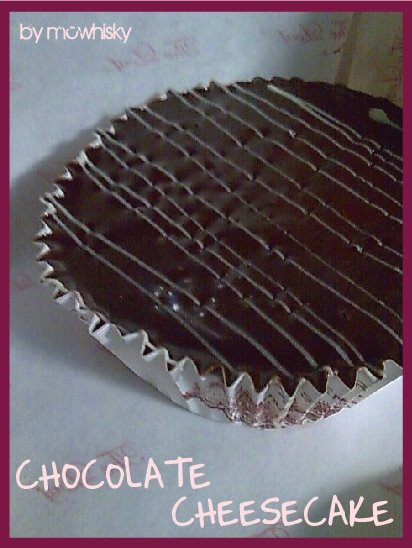
The cheesecakes on the display area were distracting, we can't stop drooling over the cash-counter. Gosh. We had a lemon cheesecake, chocolate cheesecake and the delished longan cheesecake.


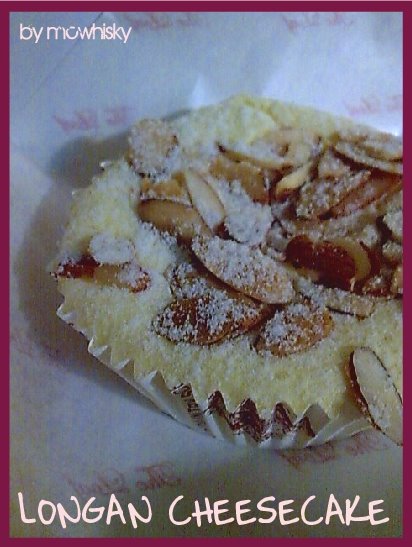
Longan cheesecake (or was it lychee) was flavorsome and fluffy. The toasted almond flakes lend a great help by creating an addictive crunchy top for the pillowy soft cheesecake. The biscuit base was annoying as it kept falling onto the ground after one bite. Overall, we've gone u hu hu after downing the cheesecakes. Yum!

The Loaf (Pavilion Kuala Lumpur)
Lot 3.13.00 & 4.12.02,
Level 3 & 4 Pavilion,
Kuala Lumpur,
168 Jalan Bukit Bintang,
55100 Kuala Lumpur.


Wednesday, April 30, 2008

Cheesecake Pops: When Cheesecake Falls For Lolly Sticks

Our Daring Bakers Challenge #1


This post should be posted up right on the 27th of April, which is Sunday and shoot, we've just managed to get the baked goods done on the day before. And these dainty looking miniature Popsicles were all gone the next day after. That was fast. Without hesitation and worries for contributing excess calories into our body system, we've grab a few sticks to kick start our pulses. It WAS as good and delish as it claimed to be.


Procrastinating is killing us, and we have just thought it over; well, better late than never. Though we were 3 days late for posting this up. We're very determined now; as this is our first Daring Bakers Challenge to be. Our very first task
is cheese on sticks; which were called as Cheesecake Pops to other bakers.


Daring Bakers (DB) Challenge for the month of April; Cheesecake Pops from a dessert cookbook titled "Sticky, Chewy, Messy, Gooey", written by Jill O'Connor. April's DB Challenge were hosted by Elle from Feeding My Enthusiasm and Deborah from Taste And Tell. We were totally excited as it was our first DB challenge. Enthusiastically joyful when the lip smacking cheesecake pops were done.


Days before the big day (of messing around in the kitchen), we were strolling around the city in the hope of getting ourselves a humongous packet of lollipop sticks. From bakery stores to big marts, none were to be found. Alas, after searching for days, we've gave up and get down and dirty with a chock full of lean wooden sticks. Let's say, skewers, which were made out of wood or may be bamboo. Each and every single stick were measured and cut into a length of approximately 3.5 inches. We hate to say this, but many were dumped into the bin due to the icky splinters, frustrating. Very frustrating.

Cheesecake Pops (Yields: 30 – 40 Pops)

5 8-oz. packages cream cheese at room temperature

2 cups sugar

¼ cup all-purpose flour

¼ teaspoon salt

5 large eggs

2 egg yolks

2 teaspoons pure vanilla extract

¼ cup heavy cream

Boiling water as needed

Thirty to forty 8-inch lollipop sticks

1 pound chocolate, finely chopped – you can use all one kind or half and half of dark, milk, or white (Alternately, you can use 1 pound of flavored coatings, also known as summer coating, confectionary coating or wafer chocolate – candy supply stores carry colors, as well as the three kinds of chocolate.)

2 tablespoons vegetable shortening

(Note: White chocolate is harder to use this way, but not impossible)

Assorted decorations such as chopped nuts, colored jimmies, crushed peppermints, mini chocolate chips, sanding sugars, dragees) - Optional

1. Position oven rack in the middle of the oven and preheat to 325 degrees F. Set some water to boil.
2. In a large bowl, beat together the cream cheese, sugar, flour, and salt until smooth. If using a mixer, mix on low speed. Add the whole eggs and the egg yolks, one at a time, beating well (but still at low speed) after each addition. Beat in the vanilla and cream.
3. Grease a 10-inch cake pan (not a springform pan), and pour the batter into the cake pan. Place the pan in a larger roasting pan. Fill the roasting pan with the boiling water until it reaches halfway up the sides of the cake pan. Bake until the cheesecake is firm and slightly golden on top, 35 to 45 minutes.
4. Remove the cheesecake from the water bath and cool to room temperature. Cover the cheesecake with plastic wrap and refrigerate until very cold, at least 3 hours or up to overnight.

5. When the cheesecake is cold and very firm, scoop the cheesecake into 2-ounce balls and place on a parchment paper-lined baking sheet.

6. Carefully insert a lollipop stick into each cheesecake ball. Freeze the cheesecake pops, uncovered, until very hard, at least 1 – 2 hours.

7. When the cheesecake pops are frozen and ready for dipping, prepare the chocolate. In the top of a double boiler, set over simmering water, or in a heatproof bowl set over a pot of simmering water, heat half the chocolate and half the shortening, stirring often, until chocolate is melted and chocolate and shortening are combined. Stir until completely smooth. Do not heat the chocolate too much or your chocolate will lose it’s shine after it has dried. Save the rest of the chocolate and shortening for later dipping, or use another type of chocolate for variety.
8. Alternately, you can microwave the same amount of chocolate coating pieces on high at 30 second intervals, stirring until smooth.
9.Quickly dip a frozen cheesecake pop in the melted chocolate, swirling quickly to coat it completely. Shake off any excess into the melted chocolate. If you like, you can now roll the pops quickly in optional decorations. You can also drizzle them with a contrasting color of melted chocolate (dark chocolate drizzled over milk chocolate or white chocolate over dark chocolate, etc.) Place the pop on a clean parchment paper-lined baking sheet to set. Repeat with remaining pops, melting more chocolate and shortening (or confectionery chocolate pieces) as needed.

10. Refrigerate the pops for up to 24 hours, until ready to serve.


We took more than stated, to bake the cheesecake. An hour plus. We covered half of the pops with white chocolate while the remaining was covered in dark chocolate. A mix of shortening blends perfectly into the chocolate-dipping pool, where chocolate were easily set once the cheesecake pops had finished swimming and swirling. Toppings were sprinkled onto the pops before the chocolate has set entirely. A block of Polytherene was used as to keep the cheesecake pops in an upright position to let the pops set properly. We were afraid that the toppings on the half-set pops might fall off if they were laid onto the tray - lined parchment paper. Toppings include toasted almond flakes, finely milled digestive biscuits, finely milled black sesame and colorful hundreds and thousands.


Since we have some chocolate as leftovers, it was then melted and piped onto the cheesecake pops. A cute-looking rodent was created. A female rodent with a rose bud on its ear, to be exact.


The other two came along; a pooch and a cold fat lard; a piggy. Poor quality shots, because we were in a hurry. The verdict; the cheesecake pops were creamy and its luscious cheese filling is the star in its own form. It may looked unimpressive, but taste wise, the kids are giving in their two-thumbs up.


Saturday, March 22, 2008

Reviving The Dead Blog - Our Last Xmas

Blog has been in a coma status for, lemme see, 3 months at least? And it's a wake up call to kick start the blogging craze after finding out that the pen drive is jam packed with hundreds of unedited shots. Thinking aback, things happened pretty quick, which came into our favor since grandma were hospitalized for a very long period, no thanks to the infection and ulcer that she had been suffered from. We were glad that grandma is doing just fine right now. And yea, it's time to jump start old posts besides working on our new layout for our blog. Once we have upgraded our blog version, old template was gone for good, which lures in the new background. It might be too messy, like they say; overwhelmed with calligraphy-drawn cherry blossoms. As for the banner, we managed to squeeze in the fantastic four; the four best loved pooches. Take a quick glance at the top banner which is embedded with a pink border; you'll see (from left to right) Whisky the Australian Silky Terrier, R.I.P Missy the mix Spitz, Rufus the White Miniature Schnauzer and last but not least, Boobie the Golden Retriever. A brand new layout for the brand new year; which seems to be the first post of the year 2008. =)


Well, we will start off with our last Christmas baked goods, and no sooner or later, there will be the other procrastinated and outdated post of the very belated Chinese New Year celebration. On Xmas, we loathe on buttercream, cheese and chocolates for goodies like cakes and cupcakes. Where else, on CNY eve, we loathe on tubes of butter and flour for cookie-making. The similarities; festive seasons is all about baking, family gatherings and the kindness of sharing. (when you have too much cookies in the cookie-nook) =P


On the Xmas eve, we lay our hands onto rolling a baked chocolate sponge; a Xmas Yule log cake for a small Xmas Gathering in our low-cost home. We've always wanted a Yule log cake for Xmas, and we thought this might be IT. Our first Yule log cake. A Yule log cake; a rolled cake with luscious filling modeled similarly like a fallen log, frosted with cream and decorated with chocolate shavings, icing sugar, meringue mushrooms, cocoa powder and dummies. We slack off, and leave the meringue mushrooms behind. As for the dummies, a mini Mr. Santa will do just enough though we love the reindeer and the elves. A spongy chocolate sheet were baked and laid on a parchment paper. The parchment paper were lightly sprinkled with fine sugar to avoid cake sticking onto the parchment paper. We proceeded to the creamy chocolate buttercream and a simple Whisky-infused syrup while cooling off the chocolate sponge. After spreading the buttercream with a long spatula, we begin the rolling session. While rolling, brush the chocolate sheet with the syrup to forbid the sponge from cracking. When the rolling is done, we frosted the entire log cake with the remaining buttercream and top off with chocolate shavings, Mr. Santa, peppermint flavored candy canes and edible firs; made out of buttercream. More details about Yule log cake here.


How can we not bake cupcakes during the festive season or even gathering?! It consumes less time and just by venturing into different flavor and colors of buttercream, we will have many cupcake flavors to offer. By whisking the vanilla cupcake batter, we manage to offer four flavors to the crowds; vanilla cupcakes filled with either chocolate ganache, strawberry jam fillings, peppermint chocolate ganache and vanilla pudding. Vanilla cupcakes filled with chocolate ganache were given a swirl of green vanilla buttercream and a snowflake-like design.


Shot above; vanilla cupcake filled with peppermint chocolate ganache and topped off with vanilla buttercream and halved candy cane. To pull the peppermint-look, mint leaves were used as its decor.


Then, we have this vanilla cupcake with vanilla pudding as filling. The pudding were filled into the cupcakes using the cone method; see here. It was then topped off with buttercream which resembles an Xmas tree decorated with pink ornaments. A star-shaped sugarpaste were placed onto the top of the fir-tree.


The strawberry cupcake; a vanilla cupcake filled with strawberry jam filling were given a purple swirl buttercream and ended up with a yellow star-shaped sugarpaste.


As we still have two tubes of Philly's cream cheese in the refrigerator, we were keen to whisk up David Lebovitz's Black Bottom Cupcakes as there were rave reviews about it. The chocolate cupcake batter were moist and not as dense as we've expected. And the cream cheese as part of the cupcake filling is real yummy; to be licked with bare fingers.


Our version of Black Bottom Cupcakes rises too much and it might be over-filled. Thus, we came up with chocolate whipped cream as its frosting. We so wanted to serve these babies without frosting, but the fact is it's too volcano-like; a volcano waiting impatiently to erupt. We opt for the lighter frosting; whipped cream rather than the usual buttercream though it can withstand heat better than the former. Lastly, we top the cupcake with halved bittersweet chocolate block. The Black Bottom Cupcake was a hit relatively to the plain cupcakes. The chocolatey cupcake blends in well with the light texture of cream cheese and whipped cream, and it was not too creamy and sweet for the hard-to-please people.


Henceforth, the last and remaining tube of cream cheese went to the White Chocolate And Banana Cheesecake in cupcake form - spoon to eat. The recipe was basically adapted from Women's Weekly. The change were the addition of melted white chocolate into the cheesecake, white chocolate ganache topping and digestive biscuit cum walnut base. The cheesecake filling; mashed bananas and silky white chocolate ganache teamed up with the digestive biscuit cum walnut base was half the divinity. We should have sprinkled handfuls of chocolate chips in it; and it'll be a definite keeper for the night itself. The topping; white chocolate ganache hardened; which leads to the conclusion of one fourth of divinity. We ARE still wondering why does it harden though there were quite an amount of whipping cream which were used to infused with the melted white chocolate. It forms into a hard yellowish disk and people were ditching away the disk just to get a taste of the filling. Oh boy.


The last baked goods of the night was a pan of Walnut Chocolate Brownie. The brownie does not turned out to be as moist as the book have stated. It might be overbaked but we were very sure that it wasn't because the brownie was already taken out of the oven a few minutes earlier. This calls for sweetened syrup to be brushed onto the brownie's surface and hot chocolate fudge as its topping. It might not sound appealing but it DOES save the night. The brownies were sliced into mini rectangles, and lastly topped with toasted walnuts, a dust of icing sugar and mint leaves.


There were many left-overs though. Some of them packed the goodies away while some went down to our stomach. Let's just say; OVERDONE! The Xmas gathering was a fun-filled night, plus, it's peaceful - just the way we like it. =)


Saturday, September 1, 2007

August Is Definitely Gay

We've been counting and marking the calendars with red markers from time to time. Nothing to do with the excruciating PMS. In fact, there were so many August babes; that sometimes we lost count! Starting from Reneh (4th of August) to Molly and Amy (31st of August). There were plenty in the mid of that particular happy month. Best yet, the day of our very re-owned Independence Day which falls on the 31st.


Hence, we came up with a small batch of vanilla cupcakes topped with vanilla cream and buttercream whereby its designs resembles Malaysia; Merdeka Cupcakes.


As time and schedule becomes more hectic than the usual, we've jumped into the bandwagon.


And that is clearly understood why we would only choose the one and only vanilla buttercream rather than the other flavorings. Red buttercream were piped onto the fluffy whipped cream as to resembles the red horizontal lines of Malaysia's flag. Next, we laid our paws into kneading sugarpaste.


Blue sugarpaste resembles a part of the flag. While on the other hand, the magenta dough of sugarpaste were used for the the crescent moon and star symbols. The star were cut out of a star nozzle as the cupcakes were real mini.


After drying the sugarpaste for some time, the hardened sugarpaste were placed on the top of the cupcakes.


And there goes our afternoon naps; happily brainstorming these Merdeka babies. On the same day, we've sketch out Molly's and Malar's cake-to-be and gather info about the few cakes that she'll love. After some quick doggy naps, we recalled that she told us that she's a velvet cheesecake fanatic. Henceforth, we combined the idea of cheesecake and her favorite fruit of all; mangoes!


And here goes the Mango Mirror Cheesecake for Molly and Malar!

Crust;
250g digestive biscuit; crushed into fine crumbs
125g butter; melted

Fillings;
500g cream cheese; let sit in room temperature to softened
120g caster sugar
3 medium eggs
3 tablespoons corn flour
200ml milk
100g mango puree
1/2 teaspoon vanilla extract

1. For the crust, combine and mix the crushed biscuit with melted butter. Press this crust-mixture into the bottom of the 9 inch of a springform pan. Set aside.
2. For the filling, beat cream cheese and sugar till soft and creamy with an electric mixer. Add in eggs; one at a time and beat till incorporated; to avoid curdles. Beat in the milk, corn flour, mango puree and vanilla extract till well combined. Pour mixture into the prepared springform pan (which refers to the pan in instruction no.1).
3. Bake in preheated oven of 160''C for about 40 to 50 minutes. When the cheesecake is baked, the top of it is firm when touched lightly.


Topping;
400ml water
30g instant jelly powder
50g mango puree
50g caster sugar

1. For the topping, combine water, instant jelly powder, mango puree and caster sugar on a saucepan. On a low heat, stir constantly till sugar had dissolved. Bring to boil for 5 minutes.
2. Set aside and cool slightly. Pour onto the baked mango cheesecake although the liquid is still warm.
3. Store the cheesecake with its springform pan in the refrigerator for about 4 hours before taking off the springform pan.


As for the decorations; it's up to each individual's creativity. Decorations were made once after the 4 hours cooling sessions; once the pan has taken out. By then, it is time to transfer the whole cake onto the cake cardboard.


As for Molly's Mango Mirror Cheesecake, we used the mango flesh to garnish the cheesecake. Only one mango is needed. Mango's flesh were sliced vertically with a fruit peeler to obtain the longest layer from the mango. After slicing, fold the mango slices with fingers whereby each hollowed holes is approximately the size of a thumb. Then, freeze the mango slices in the freezer for about 10 minutes for easy handling.


Next, we topped the cake with whipped whipping cream. Then, the extra whipping cream were piped into the hollowed holes of the mango slices.


This came down to arranging the mango slices filled with cream onto the whipping cream.


For perfection, brush the apricot glaze onto the mango slices.


Voila! The entire cheesecake.


Next, the message-piping session; which reads out; Happy Birthday To Molly And Malar.


The cheesecake is best eaten cold. Yet, it is advisable that the cheesecake had to be chilled before serving as the crust will crumbles easily. Once the cake were done, we refrigerate it overnight, with the box of course; for hygiene purpose. Off to work then!


On the very next day which is the 30th, after our working hours, we managed to grab some heavy Thai-supper at a small lot in Taman Teratai. Opposite Klinik Saraya & Surgeri. Although it's a small stall with no air conditioner, there were much customers willingly waiting for their food. Not surprising as their Thai food were great and suits our liking. Ratings; 8 out of 10. Besides, it's affordable and best of all, it stimulates our appetite.


The best dishes that we've tried were none the other than their super thick and tasty Tom Yam Soup which costs us only about RM10 for a pot (which is for 3-4 person), Thai style beancurd, Sotong Ball aka Calamari Ball and their varieties of fried rice. Shots can be hardly taken as Fatass and her colleagues which included Molly, Malar and Moon, were sweating out for more Thai-food. Here's some;


Molly's favorite; Thai-style beancurd.


Mango Chicken; which most of us prefer its crunchy skin rather than the white meats.


Thai-style clams.


The usually-ordered-dish; Chili with water spinach or best known as; belacan with kangkung.


Best calamari ball aka sotong ball we've ever eaten! There are real big calamaris in it.


Their dish which consists of big ol fishes were sold at the range of RM18-RM30. Their Thai-style fried fish were not too bad though.
After the heavy supper, the girls headed back to the big ol van for some unofficial cake cutting ceremony for both Molly and Malar.


Everyone was full, hence, only the fattest ass had a piece out of it. Fatass. =)


Whenever there's 'unofficial', there must be the existence of the other which is 'official'. Her official cake cut-out were held in Neway; with the help of the main organizer; Reneh and her hubby. The celebration of the Merdeka eve were celebrated in the same place too. Fun-filled day though it's a bit hectic to us. Lastly, a BIG buttday shoutout to Molly and Malar; Happy Buttday girls!!!