Saturday, June 7, 2008

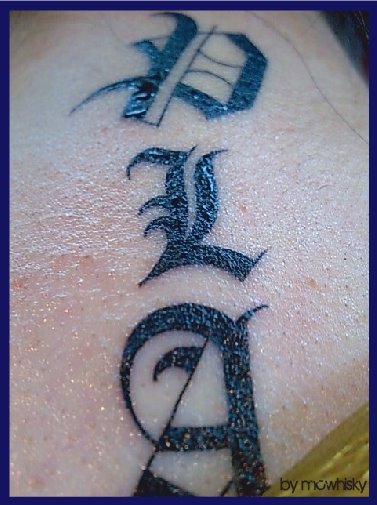
Tattooed

An Idea To Art
By R.L. Danner


As I walked my path through life
My body being my temple of ideas


I wanted to express myself, my own way


Walking into the shop that day
I found my expression waiting for me
Custom drawn just for me in black line art


I made my way into the studio in the back
My nerves dancing in my skin and mind


As I sat down in the chair I knew this was it
Forever in my skin it would lay


As the artist prepared the machines
I watched in awe of his precision and care


The time had come and that buzz and click began
My flesh was prepared to receive its gift
As the razor slid down my back I closed my eyes


It was time to lay the idea into my skin
With artist vision the hands and steel became one


Flowing over my back in defined motion
A picture became a living portrait of life
As the minutes passed I felt the ink be laid
Into my skin like a humming bird kisses a rose


When all was said and done I stood once more
This time to see my idea frozen in time


As a portrait of vision in my skin
Laid in brilliant color for the first time


Now I understand the meaning of a
Tattoo


Model: Arisa
:)


Wednesday, June 4, 2008

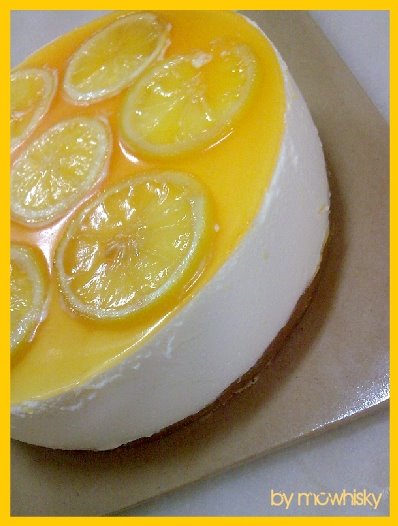
Easy Breezy Chilled Lemon Cheesecake

After rounds of bake sale which is mostly baked cheesecakes, we managed to steal time and came up with a chilled cheesecake (no baking/oven involved). As for the bake sales, we are now planning to venture into online bake sales, which is something we have planned months ago. To jump start the venture, we are now happily baking cakes, cheesecakes and tortes for try-outs besides than prep-ing the ready-made baked goods for a cheap photoshoot. May things go well, considering that we're great procrastinators.


As of the chilled cheesecake, we went back to the basics. How about a chilled lemon cheesecake, something simple and flavorful, we reckon? Speaking of the truth, we have always been alienating chilled cheesecakes especially the plain ones, as we find it rather disgusting due to the uninviting aroma of gelatine - think of liquid glue. Things are different when there are more flavorsome and appealing aroma that will overcome the gelatinous smell or best yet, empower the entire chilled cheesecake.


Since our helpers and the kids can be categorized as ardent lemon lovers, why not a chilled cheesecake flavored lemon? Though we would love to have a green tea infused chilled cheesecake at first. At least, the chilled lemon cheesecake will be wiped off clean from the serving plate just in 2 days compared to the green tea, thanks to the natural citrus flavor in lemons. Like how democratic countries worked, the majority wins. Green tea cheesecake will only cost us more leftovers and extra pounds as the intensified ones tasted rather bitter and smelt grassy.


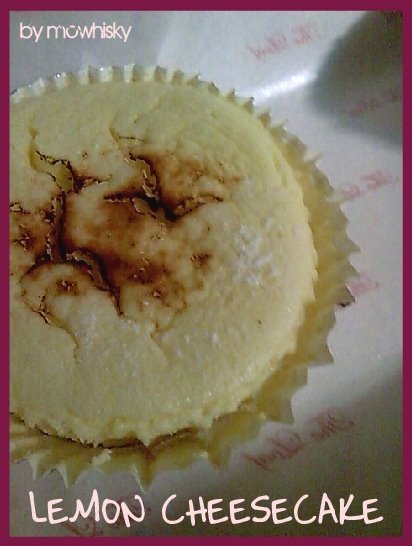
The chilled lemon cheesecake tasted not as jelly-ish and gooey as we have already stereotyped on most chilled cheesecakes. The lemon flavor was just right, identifiable flavor which is not intensified. One of my helper, which is an even straight arrow person, claimed that it was a creamy cheesecake, and ended with a but. But. Here goes the usual but from her, which sometimes prickle us off. And that is what we wanted to hear, because there is always a room for improvement.


Pleased, and at the same time, confused, she mumbles as she was spooning the chilled cheesecake away from her serving bowl. Standing still impatiently as we waited for her to finish half of the serving slice, we stared foolishly at the sliced-up cheesecake. What is wrong with the chilled baby? Minds pondered. It's either the gelatine cum glue-ish aroma, or it might be the coarsely chopped lemon zests, we thought for awhile. We soon stared strangely back at her; one of our helper and asked for unravel reviews that she had planned to give us. "The lemon aroma was there, but I can hardly taste it".


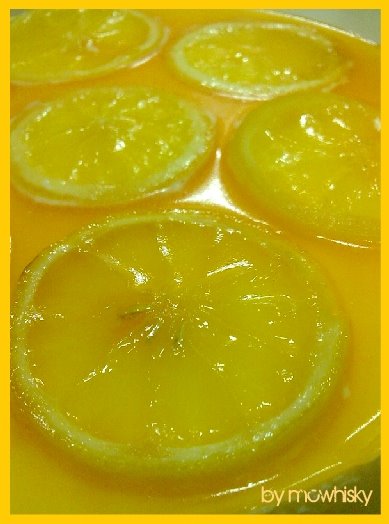
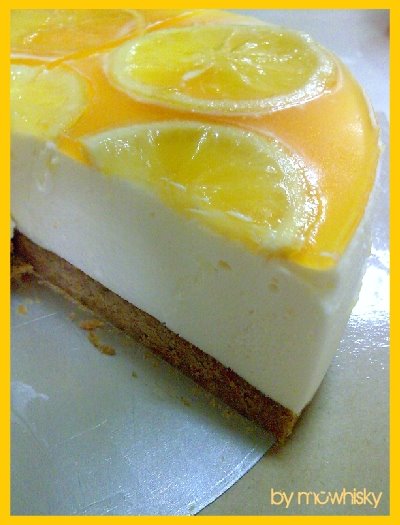
That's it! The lack of lemon juice. Which brings us to a more subtle lemony cheesecake. It was quenchable and creamy, just like how texture of mousses are, with a hint of cream cheese. We doubled the digestive crust for the extra crunch, as to blend in with the mousse-like cheesecake. The topping were made out of lemon juice, water, gelatine, a tiny bit of sugar and yellow coloring - a jellified layer which looked pleasant and tempting on the chilled cheesecake.


Before the jellified layer was set, the arrangement of sliced lemon were aligned decoratively onto the surface of the cheesecake. The sliced lemon were somehow too sour and hard for human consumption. If there's another quickie to be done the next time, we will definitely forgo the lemon slices though the chilled lemon cheesecake looked simply divine with it.


Chilled Lemon Cheesecake

For the cheesecake:
300g digestive biscuit (we used McVities)
150g butter, melted
250g Philadelphia cream cheese, thawed at room temperature
1 egg yolk
1 egg white
80g caster sugar
1-1/2 tablespoon gelatine powder
3 tablespoon water
3 tablespoon lemon juice (we used 2-1/2 tablespoons of lemon juice, and thus the subtle cheesecake)
1 tablespoon lemon zest, finely grated
225g whipping cream (measured at 225g before whipping, whipped until firm peaks, let chilled)

1. Finely crushed biscuits - either with a rolling pin or a blender with sharp blades. Combine finely crushed biscuits with melted butter. Press into the base of a 8 inch round springform cake pan.
2. Using electric mixer, in a bowl, beat cream cheese until creamy and smooth. Scrape the sides of the bowl. Add in egg yolk and sugar. Beat until well combined. Set aside.
3. Mix gelatine with water in a small bowl. Stand the bowl in hot water until gelatine has dissolved (the mixture will look ooey gooey and sticky!)
4. Add the gelatine mixture into the cheese mixture. Mix well. Add in lemon juice and lemon zest. Mix until well combined.
5. Mix in whipped cream with a rubber spatula.
6. Beat egg whites until firm peaks formed. Fold gently into cheese mixture with a rubber spatula until well combined.
7. Pour mixture into prepared pan. Chill for about 2 hours before proceeding to the topping.


For the jelly topping:
1 teaspoon lemon juice
2 teaspoon caster sugar
250g water
2 teaspoon gelatine powder

1. Mix all the ingredients above. Boil on a saucepan over low heat till sugar and gelatine powder dissolves. Remove from heat and let cool until slightly warm.
2. Pour onto cheesecake. Put into fridge and let to set. Happy baking!


Some blur poochie shots (dated months back) to indulged in. There's a huge difference in photo editing, which is pretty bad. Bear with us. ;)


A grown-up and untrimmed Miniature Schnauzer, with pepper coat.


Months-old young Miniature Schnauzer, yawning continuously during a cat nap.


A young Beagle posing macholy.


Beagle Pose.


Last shot of the young Beagle.
Enjoy! ;)


Monday, June 2, 2008

Banana + Toffee + Pie = Go Figure ;)

Lo' and behold, our most unforgettable yet favorable sum of all; banana + toffee. You need to add, and please, do not subtract for the sake of the quote 'live to eat' in order to get the exact jargon that is implied in here. Now, do the math. Tell us, what can you conclude with the unresolved stated sum? A rather positive answer which we all would mostly agree and love to have during sugar high weekends? Or was it a negative account? You be the judge. It was decades ago since this combo flavor was invented; the bananas and the toffees. Partly dumb, we have always mistaken caramel for toffee and toffee for butterscotch, vice versa. Ever since we laid our eyes on the Toffee Sundae from McDonalds which has a blend of bananas and toffee sauce, we knew that there's no point of return. We need TOFFEE and BANANAS for brunch! And something tarty too!


So, let's settle down with the very delish mathematic equation;
  • Banana + toffee = Ban(offee) = Banoffi
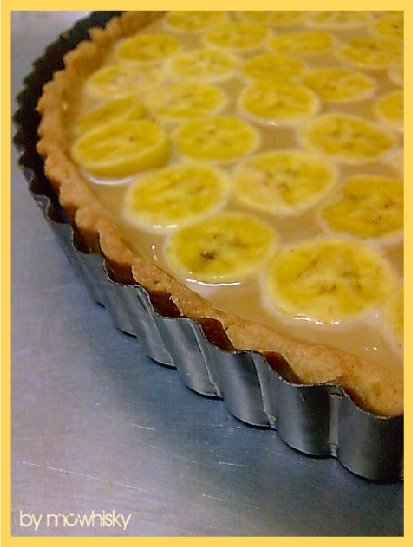
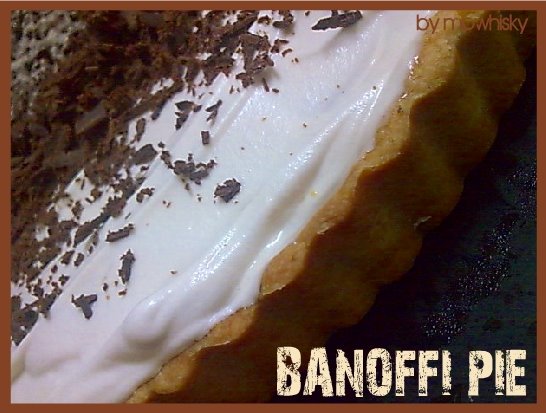
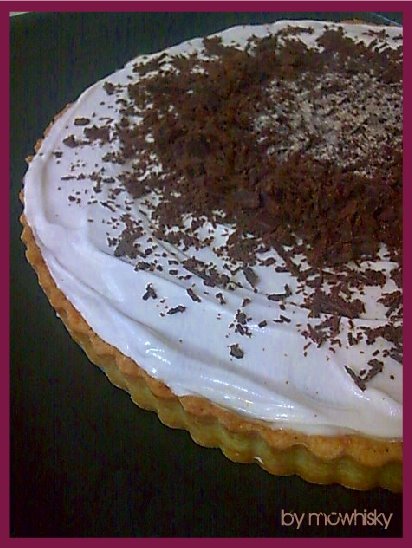
  • Banana + toffee + pie = Banoffi Pie


That does make real sense. Banana and toffee, which will be called as one; Banoffi, when merging occurs. In case, one may wonder, who is the mastermind behind this particular heavenly creation with the luscious perfect combo? It is absolutely a bullseye, really did hit the nail on the head. The humble and generous man who has nailed the divine-looking Banoffi Pie was Ian Dowding, the man who we have no doubts that he's in the D.T.E category. D.T.E; which ambiguously stands for down to earth.


It was known that the the very first Banoffi Pie was served at The Hungry Monk in Jevington, East Sussex during the year 1972, and that was baby Banoffi's birthplace. From other sources that we found in the world wide web, it stated that the banoffi pie recipe was devised by Ian Dowding and Nigel MacKenzie.


From the article titled "I invented Banoffi Pie" by Ian Dowding, from July 2007's Reader's Digest, he said it is her sister who told him over the phone on the steps to making soft toffee by boiling a can of unopened condensed milk in water for several hours. From there, he resurrects Rusell's; Blum's Coffee Toffee Pie. With Nigel MacKenzie, they were on the hunt for a newer dimension of the toffee pie, trying out from apples to mandarins. They knew they had cracked the secret code when bananas were used.
Thus, the invention and the crown.


We boiled around 3 cans of condensed milk for the toffees too, with the aid of Ian Dowding's Banoffi Pie recipe. The first can didn't make it (shot above). It was just too watery and light in presence, thanks to the young minds involved; who can't wait too much longer and claimed that they should go on with the can opener. The verdict; that is just so not the toffee that we wanted because the recipe has assured us that the consistency of the toffee will be something spreadable.
We boiled for the extra 2 hours and things flowed smoothly thereafter. Lumpy and spreadable toffee in cans! Here's the way how the boiling method works, hailed from Ian Dowding's website.


Toffee (by Ian Dowding, from http://www.iandowding.co.uk/)
Ian Dowding: "Over the years I have become increasingly concerned about the danger of boiling cans of condensed milk. There is no danger of them exploding unless the water in the saucepan boils dry. If this does happen the result is terrifying and can scald anyone close to it. It has happened to me once and that was enough. Because I now teach and demonstrate a lot I like to make sure my instructions are safe so I have devised this method."

1. Find a deep saucepan or casserole that will go in the oven.
2. Put into it as many tins as will fit. (THE TINS MUST BE UNOPENED). It worth doing several at a time to save on power.
3. Cover the tins with water and bring to the boil.
4. Cover with a lid and transfer to the oven set to gas mark 1 / 140 C (less for fan assisted).
5. Cook for 3 ½ hours.
6. This way there is no danger of the water boiling dry and being in a more controlled temperature you get a more consistent result.
7. Lift the cans from the water, cool and store.
8. An unusual bonus comes from storing these tins over a period. After some months sugar crystals begin to form in the toffee and you get crunchy banoffi - mmmmm.


Banoffi Pie
(by Ian Dowding, from http://www.iandowding.co.uk/)
You will need a 10 x 1½ inch (deep) loose bottomed flan tin
Oven temp: 180 C / gas mark 4

For the pastry:
250g / 9 oz plain flour
25g / 1 oz icing sugar
125g / 4½ oz butter
1 egg and 1 egg yolk

1. Place the flour and sugar in a bowl, cut the butter into cubes and then rub it in to the flour / sugar until it resembles fine bread crumbs. Work in the egg to form a paste.
2. Chill for half an hour then roll out to the thickness of a pound coin and line the flan tin.

3. Prick the base, line with parchment paper and weigh down with dry beans (we go full force with grains of rice)
4. Cook for fifteen minutes then remove the beans and paper.
5. Put the pastry case back into the oven and cook until it is evenly golden.
6. Remove from the oven and cool.

To assemble:
1 ½ tins of banoffi toffee (see note below on boiling the tins or click here)
5-6 ripe bananas
425 ml / ¾ pint of double cream
1 teaspoon of instant coffee
1 dessertspoon of caster sugar
A pinch of ground coffee

1. Carefully spread the toffee over the pastry base.
2. Peel and split the bananas lengthways and arrange them on top of the toffee, (see how they fit the curve of the pastry - that’s why God made bananas curved).
3. Whip the cream with the instant coffee (if they are granules they will dissolve as you whip the cream) and the sugar until it just holds its shape - take care not to over whip it.
4. Spread the cream over the bananas right up to the pastry edge then sprinkle sparingly with the ground coffee.
5. If you are not serving it immediately cover first with some baking parchment or greaseproof paper directly onto the cream and trim the edges then wrap in cling film.
6. It does not lend itself to being frozen.

The final outcome was a blast. Bananas will never (ever) go wrong with toffees. Speaking of the tart which is also known as the pastry itself, it remains its tartness though left overnight in the ice-cold refrigerator. It was slightly crunchy and dry, which blends in well with the fluffy yet pillowy coffee cream. The toffee was the sublime of the grand pie. This is definitely a keeper, the only thing that bugs us out is toffee-making, which takes time. But it was worth the time-consumption, as we are all toffee's die-hard fans. Divine and delicious, enough said. =)


The very last month, we hooked up with The Loaf's public favourites; U Hu! Hu! Cheesecakes. The cheesecakes were the latest sensation from Japan, and these lovely babies are now our latest BFFs. Ehem, doughnuts, cupcakes, anyone?!


It was worth buying, since we don't really go for wholesome cheesecakes. Light ones will just do more than enough. Each costs us RM5, and by purchasing 6 cheesecakes, you will only be paying for the price of RM25. Let's just put it this way, buy 5 free 1.


It was not as cheesy as we've expected, it tasted more like a light and fluffy cheese souffle which melts in your mouth. Something people would go for as refreshments, okay, maybe it's just us. We wanted more, but our bulging belly stopped us spiritually. We ordered 3 of the wide-range cheesecakes.


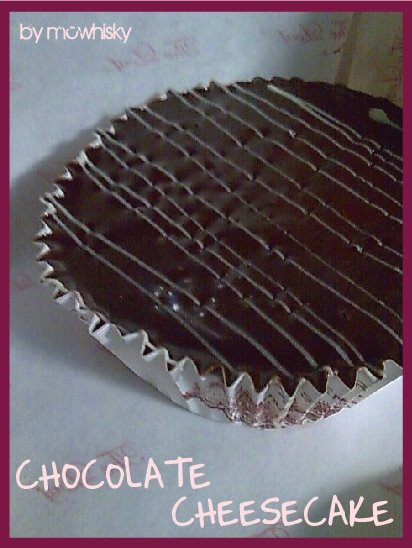
The cheesecakes on the display area were distracting, we can't stop drooling over the cash-counter. Gosh. We had a lemon cheesecake, chocolate cheesecake and the delished longan cheesecake.


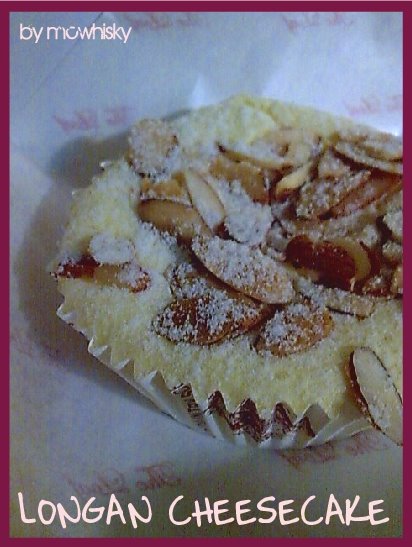
Longan cheesecake (or was it lychee) was flavorsome and fluffy. The toasted almond flakes lend a great help by creating an addictive crunchy top for the pillowy soft cheesecake. The biscuit base was annoying as it kept falling onto the ground after one bite. Overall, we've gone u hu hu after downing the cheesecakes. Yum!

The Loaf (Pavilion Kuala Lumpur)
Lot 3.13.00 & 4.12.02,
Level 3 & 4 Pavilion,
Kuala Lumpur,
168 Jalan Bukit Bintang,
55100 Kuala Lumpur.




Friday, May 30, 2008

Plumped Plum Marries A Big Fat Tart

Recently, we have been occupying most of our time collecting good reads, streaming the very talented and charming David Archuleta's performance cum shows and experimenting tarty bakes. Lives get busy and healthy (think of going for walks and jogs every other morning for 2 hours straight with the girls, and more trekking to come on weekends), updating blogs came off pretty infrequent, which is something bad, we reckon. Well, speaking of good reads, let's just forget about Danielle Steel, J.K Rowling, J.R.R Tolkien and Dan Brown this time, and hop onto the other genre which is very much related to the world of pastry and baking. For the record, we're still craving for Kim Young Mo's hard-to-get cookbook, after hustling all over the town's bookstore for a wider huntdown. Not getting Kim's winning cookbook was not as devastating as we would have predicted though, since other cookbooks came along at the very right time.


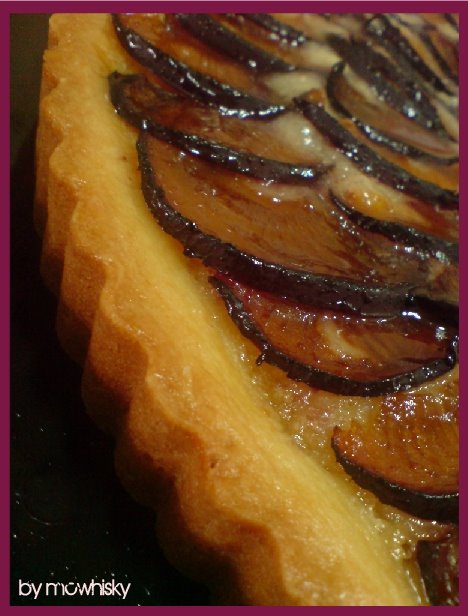
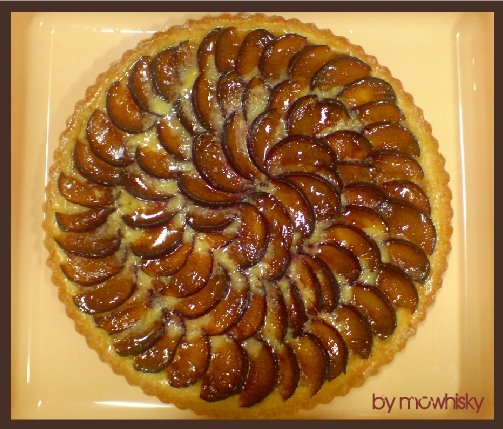
Most of our profit made from the sales of our cakes and cupcakes were happily exchanged with few other good reads - be it a local cookbook or one that's distributed internationally. And yes, we spent on one which we found it to be quite pricey (RM188), as we thought it was a steal since it was left alone in one piece, with no clones left; Pierre Herme's Chocolate Desserts. As we stroll along the aisle of the bookstores's bookshelves, we bumped into Daniel Tay's new book; Just Desserts and Other Baked Treats for the price of RM 88.80. Without hesitation, we grabbed along the 2 reads - what we would love to have in our personal bookshelves. We haven't had the time to lay our hands on any of Pierre Herme's recipes, unlike what we have already done on Daniel Tay's book. We must say that Daniel Tay's recipes came off pretty delicious. We've altered one of its tart by substituting apples with juicy red plums as we would love to have plum tart for brunch.


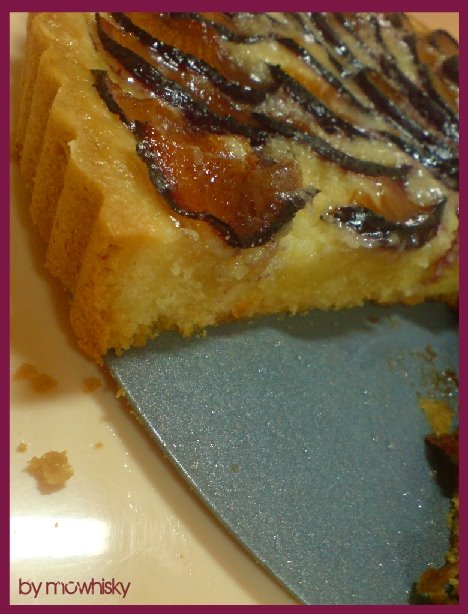
The original sable dough, which weighs in at 1.2kg was supposed to be the base for two 11-12 inches wide flan pan. We halved the dough recipe to spare extra cup of flour for the apple and plum cake. We have not heard of sable dough when it comes to tart-making, and efforts for spending on a bar of pure french butter didn't hurt much either as we totally agree that these are the best flavorsome melt-in-your-mouth tart that we've tasted. Unlike the very usual shortcrust tart, this has made a cut - think of melt-in-your-mouth butter shortbread which has a light crisp texture on the outside, fully engrossed with the aroma of pure unsalted butter. If you're eyeing for crusty and hard in texture tarts, Daniel Tay's sable dough tarts will not fulfill your request, but it will definitely made it into your baking wish list.


Wait! There's more plus point if we speak of the sable dough. We, basically don't fancy making pies and tarts as we find the sides of the tarts were usually messily trimmed and we were obviously disturbed by it; which looked unprofessionally done - or shall we say; unimpressive. It used to be an excuse to dodge request for tarts, but this ain't going to happen no more. The sable dough was perfect and less time consuming; no gentle hands were needed to smoothen out or trim the sides of the dough when it has been laid onto a tart or flan pan. It is easily handled since it is pliable and smooth, thus, small cracks can be hardly noticeable after side-trimming was done with a pastry cutter or even a knife.


The verdict of the tart; we would say the overall tart was indeed tasty. The fillings; which is known as almond cream in the book blends in well with the sable dough tart. Almonds and butter will come into our mind when this grand tart runs into our taste buds; which we find that is the two main flavor that plays a distinctive role in this tart itself.


The baked-in fruit toppings vary from pear to peaches, and not to be left out; plums! As for other options like strawberries, blueberries and raspberries; it will be laid onto the tart once the tart is fully baked - bake the tart with its fillings, let cool and topped with your choice of berries, brush with apricot glaze and serve.


Almond Plum Tart (Adapted from Daniel Tay's Just Desserts And Other Baked Treats)


Tart:
175g unsalted butter, barely thawed for about 10 minutes in room temperature
250g all-purpose flour, sifted
A tiny pinch of salt
100g icing sugar
35g finely grounded blanched almond
1 egg, medium-sized, lightly beaten

1. Cut butter into small cubes and place in a mixing bowl. Add flour, salt, icing sugar and almonds and mix with an electric mixer at medium speed to form a smooth dough.
2. Beat in eggs and mix on low speed until smooth.
3. Cover dough with cling film and refrigerate for 2-3 hours before using.

Almond cream:
125ml single (light) cream, leave to thaw at room temperature for 10 minutes before use
180g grounded almonds, finely grounded
30g corn flour, sifted
150g unsalted butter, softened at room temperature
200g icing sugar, sifted
2 eggs, medium-sized
2 tablespoon rum liquor

1. Place almond, corn flour, butter and sugar in a mixing bowl and beat for about 8 minutes until batter is free from lumps.
2. Add in eggs one at a time to avoid batter being curdled. Beat until smooth. Add cream and rum and stir until smooth.

Assembly:
1 portion of tart (recipe above)
1 portion of almond cream (recipe above)
5 large plums, cored and thinly sliced into wedges form
Apricot glaze, for glazing

1. Preheat oven to 170"C
2. On a lightly floured surface, roll out sable dough into a 0.5 cm thick sheet, large enough to cover the base and sides of 12 inch tart pan. Line pan and trim edges to neaten.
3. Spoon in almond cream and spread cream out evenly with an angle palette knife.
4. Arrange wedged plums on top of the cream. Bake for 20-30 minutes or until the tart has turned golden brown. Remove from heat and set aside on wire rack to cool.
5. Brush the top surface with apricot glaze. Serve warm, best with a cup of freshly brewed unsweetened tea.


Just in case there are abundance of red juicy plums on the kitchen counter, fret not. Get down and dirty for the next baking session; which may sound like baking from scratch. A loaf of tea cake; which may sounded similarly to a plum cake.


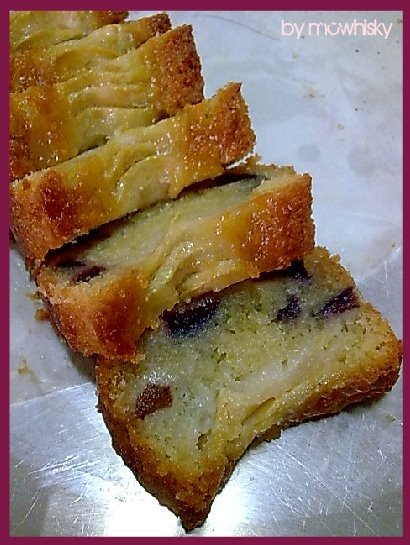
We have stumbled upon Nigel Slater's plum cake recipe, from The Kitchen Diaries, and it was undoubtedly good, moist and refreshing. We altered the recipe a little by adding slices of apples on the top of the cake (that is how the lonely green apple ended its life, how sweet) and decrease the number of plums to 5.


Fresh Plum And Apple Cake (adapted from Nigel Slater's Fresh Plum Cake, The Kitchen Diaries)


75g butter
75g caster sugar
1 egg
35g all purpose flour, sifted
3/4 teaspoon baking powder, sifted
90g almongs, finely grounded
5 plums, stoned and cut into 1 inch cube
1 green apple, Granny Smith's, cored and cut into thin wedge slices

1. Preheat the oven to 180"C.
2. Line a loaf tin with baking paper. We used a loaf tin, which measures at 16cm x 6cm.
3. Cream the butter and sugar until pale and fluffy. Beat in egg. Fold in flour, baking powder and grounded almonds with a spatula. Fold in the plum pieces into the batter with the spatula.


4. Pour the batter into the loaf tin and arrange the sliced apples on top of the batter.
5. Bake for 30-40 minutes, or until skewer inserted into the middle of the cake comes out clean. Remove from heat and cool slightly in the tin. When the cake is warm to touch, remove the cake from the tin and cool on wire rack. Serve warm with tea. Yield 6 slices.


Well, we now love brunch and tea-times.


Wednesday, May 28, 2008

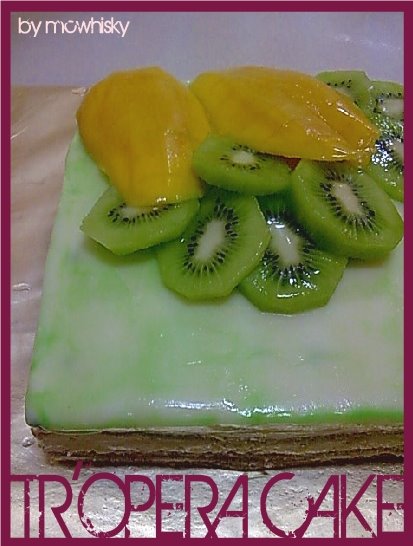
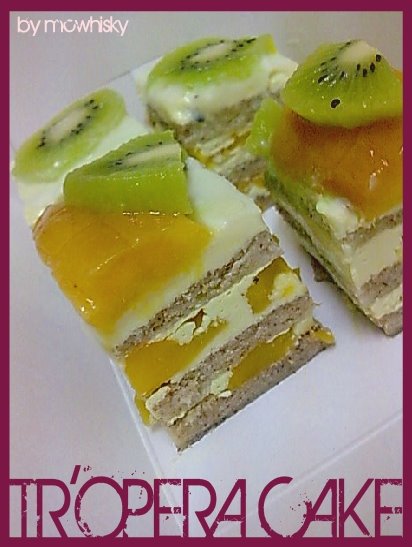
Tr'opera: Tropical Opera Cake

Our Daring Bakers Challenge #2


From the reference above, it seems that we have now proceeded to our second challenge of Daring Bakers. We are too happy for words and greatly satisfied with our 2nd challenge. The very 1st challenge that we have participated were Cheesecake Pops, and as of this month's challenge, it was our most fearful cake of all time, the Opera Cake. An Opera Cake, consisting of the main jaconde sponge, intensified flavorful syrup, buttercream, mousse, ganache and also glaze, with the usual rectangular shape as part of its identifiable features. We have always been keen to make perfect buttercream with only butter itself, and not buttercream which need to be folded with stiff egg whites. Speaking of the grand Opera cake, which involves jaconde, our unskilled physiques on whipping up a fluffy jaconde wasn't that good either. The last time we tried our hands on jaconde sheets, we ended up feasting on hard tuiles. Over baked, that might be the answer. Wait a minute, it might as well be over whipped egg whites since the batter had sunk quarterly after a few rounds of fold-cum-mix sessions with the rubber spatula. To bake or not to bake, that will be the question this time round.


The 2nd challenge was hosted by Lis and Ivonne, together with the other two newer members of DB; Fran and Shea. Baking an Opera Cake (which is originally made with chocolate, almond and coffee, with coffee buttercream) is kind of challenging, but baking an Opera Cake with light flavors and light colors (white chocolate, vanilla, lemon etc) is way upon challenging - which made this DB Challenge truly a challenge. On the same week itself, which is most probably the first week of the month of May, we sat and brainstormed the availability of flavors to be used to re-create the new Opera Cake quietly, right in front of our computer desk. Matching and pairing up the flavors was neither easy, the unsuitability of two distinctive and individual flavors might lead to bad repercussions; which spells opera cake disaster. We gathered resources and feedbacks from the kids. One suggested that the question should be served to Mom. And why Mom, we wondered for a while. Mother's Day's on the 12th of May, we were too old to be blamed - forgetfulness. That's it! Mom will then decides the flavor of this Opera Cake, specially created for her, with flavors quoted by herself.


Mom hinted that she would love to have a Mother's Day Cake which consists of real chunky hazelnuts to bite on, uber green kiwis to chowed on, white chocolate mousse to licked on and a refreshing cake which will take in passion fruit puree as well. That sounds interesting, think of bright colored fruits, well - think tropical! Thoughts of a soul which undoubtedly belongs to a novice baker whispered softly; that is a very daring move when it comes to a whole new creation of an opera cake. Daring, and our minds are mentally challenged.


The original opera cake recipe was based on Dorie Greenspan's Paris Sweets and Tish Boyle and Timothy Moriarty's Chocolate Passion. Alterations were made, starting off with the jaconde itself. The original jaconde calls for almond meal, but we go otherwise - hazelnut meal, since Mom does not favor almonds. We have
made our very own hazelnut meal to substitute the almond meal.


Hazelnut meal in our local bakery store (Malaysia) was known as grounded hazelnuts and it is blended not as fine as what most hazelnut meal was.


For homemade hazelnut meal; blend a pack of hazelnuts by an electric blender while gradually adding teaspoonfuls of flour to avoid oily paste, and last but not least, sieved the finely blended hazelnuts by spoon-pressure through a flour sifter.
Voila, hazelnut meal! Next up, the buttercream were infused with kiwi puree and passion fruit puree. On the other hand, the syrup was made out of honey with a hint of Australian wine.


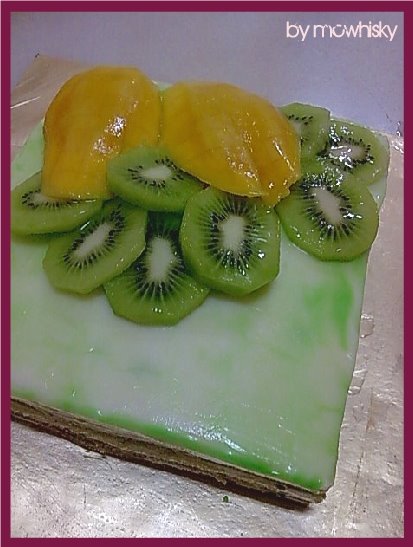
As we were afraid that the tropical opera cake might taste too bland, the search for another tropical fruit as the cake's fillings were held. Ripened Alphonso mangoes goes in perfectly! We omitted the white chocolate mousse as there were excess of buttercream left in the refrigerator. The glaze was made out of white chocolate, and the temptation to brush on a thin layer of light green colored apricot glaze were done as well. As to finalize the Tropical Opera Cake as a product, slices of kiwis and halved mangoes were arranged on the surface of the cake. The recipe below will bring about 6 parts; hazelnut jaconde, honey syrup, kiwi and passionfruit buttercream, white chocolate glaze, mango cubes, and the way the cake being assembled.


Part One: Hazelnut
Jaconde
(Note: The joconde can be made up to 1 day in advance and kept wrapped at room temperature)

6 large egg whites, at room temperature
2 tbsp. (30 grams) granulated sugar
2 cups (225 grams) ground blanched hazelnuts
2 cups icing sugar, sifted
6 large eggs

½ cup (70 grams) all-purpose flour

3 tbsp. (1½ ounces; 45 grams) unsalted butter, melted and cooled


1. Divide the oven into thirds by positioning a rack in the upper third of the oven and the lower third of the oven.

2. Preheat the oven to 425◦F. (220◦C).
3. Line two 12½ x 15½- inch (31 x 39-cm) jelly-roll pans with parchment paper and brush with melted butter.

4. In the bowl of a stand mixer fitted with the whisk attachment (or using a handheld mixer), beat the egg whites until they form soft peaks. Add the granulated sugar and beat until the peaks are stiff and glossy. If you do not have another mixer bowl, gently scrape the meringue into another bowl and set aside.
5. If you only have one bowl, wash it after removing the egg whites or if you have a second bowl, use that one. Attach the paddle attachment to the stand mixer (or using a handheld mixer again) and beat the hazelnuts, icing sugar and eggs on medium speed until light and voluminous, about 3 minutes.
6. Add the flour and beat on low speed until the flour is just combined (be very careful not to over mix batter)

7. Using a rubber spatula, gently fold the meringue into the almond mixture and then fold in the melted butter. Divide the batter between the pans and spread it evenly to cover the entire surface of each pan.

8. Bake the cake layers until they are lightly browned and just springy to the touch. This could take anywhere from 5 to 9 minutes depending on your oven. Place one jelly-roll pan in the middle of the oven and the second jelly-roll pan in the bottom third of the oven.
9. Put the pans on a heatproof counter and run a sharp knife along the edges of the cake to loosen it from the pan. Cover each with a sheet of parchment or wax paper, turn the pans over, and unmould.

10. Carefully peel away the parchment, then turn the parchment over and use it to cover the cakes. Let the cakes cool to room temperature.


Part Two: Honey Syrup

(Note: The syrup can be made up to 1 week in advance and kept covered in the refrigerator.)


½ cup (125 grams) water

⅓ cup (65 grams) granulated sugar
2 tablespoons honey
2 tablespoons Australian wine


1. Stir all the syrup ingredients together in the saucepan and bring to a boil.

2. Remove from the heat and let cool to room temperature.


Part Three: Kiwi & Passionfruit Buttercream

(Note: The buttercream can be made up to 1 month in advance and packed in an airtight container. If made way in advance, you can freeze the buttercream. Alternatively you can refrigerate it for up to 4 days after making it. To use the buttercream simply bring it to room temperature and then beat it briefly to restore its consistency.)


1 cup (100 grams) granulated sugar

¼ cup (60 grams) water

1 tablespoon pure vanilla extract
1 large egg
1 large egg yolk

1¾ sticks (7 ounces; 200 grams) unsalted butter, softened

2 kiwis, pureed and strained through sift (juice wanted)
2 passionfruit, medium-sized, pureed ( juice wanted)


1. Combine the sugar, water and vanilla extract in a small saucepan and warm over medium heat just until the sugar dissolves.

2. Continue to cook, without stirring, until the syrup reaches 225◦F (107◦C) on a candy or instant-read thermometer. Once it reaches that temperature, remove the syrup from the heat.
3. While the syrup is heating, begin whisking the egg and egg yolk at high speed in the bowl of your mixer using the whisk attachment. Whisk them until they are pale and foamy.

4. When the sugar syrup reaches the correct temperature and you remove it from the heat, reduce the mixer speed to low speed and begin slowly (very slowly) pouring the syrup down the side of the bowl being very careful not to splatter the syrup into the path of the whisk attachment. Some of the syrup will spin onto the sides of the bowl but don’t worry about this and don’t try to stir it into the mixture as it will harden!
5. Raise the speed to medium-high and continue beating until the eggs are thick and satiny and the mixture is cool to the touch (about 5 minutes or so).

6. While the egg mixture is beating, place the softened butter in a bowl and mash it with a spatula until you have a soft creamy mass.

7. With the mixer on medium speed, begin adding in two-tablespoon chunks. When all the butter has been incorporated, raise the mixer speed to high and beat until the buttercream is thick and shiny.

8. At this point add in your kiwi juice and passionfruit puree. Beat for an additional minute or so.

9. Refrigerate the buttercream, stirring it often, until it’s set enough (firm enough) to spread when topped with a layer of cake (about 20 minutes).


Part Four: White Chocolate Glaze
(Note: It’s best to make the glaze right when you’re ready to finish assembling the cake.)


14 ounces white chocolate, coarsely chopped
½ cup heavy cream (35% cream)

1. Melt the white chocolate with the heavy cream. Whisk the mixture gently until smooth.
2. Let cool for 10 minutes and then pour over the chilled cake. Using a long metal cake spatula, smooth out into an even layer.
3. Place the cake into the refrigerator for 30 minutes to set.


Part Five: Mango Cubes

(Note: It’s best to cubed the mangoes before assembling started.)


5 large Alphonso mangoes


1. Peel the skin of the mangoes with a vegetable peeler.
2. Cut the mangoes with a knife in the size of 1 inch cubes.
3. Set aside.


Assembling the Opera Cake

(Note: The finished cake should be served slightly chilled. It can be kept in the refrigerator for up to 1 day).

  • Jaconde
  • Honey syrup
  • Kiwi and Passionfruit buttercream
  • Mango cubes
  • White chocolate glaze
  • Some light green colored apricot glaze (optional)
  • 1 large Alphonso mango for decoration (optional)
  • 2 large kiwis for decoration (optional)
1. Line a baking sheet with parchment or wax paper.
2. Working with one sheet of cake at a time, cut and trim each sheet so that you have two pieces (from each cake so you’ll have four pieces in total): one 10-inch (25-cm) square and one 10 x 5-inch (25 x 12½-cm) rectangle.
3. Place one square of cake on the baking sheet and moisten it gently with the honey syrup.
4. Spread about one-third of the kiwi and passionfruit buttercream over this layer.
5. Place half of mango cubes onto the buttercream.

6. Top with the two rectangular pieces of cake, placing them side by side to form a square. Moisten these pieces with the honey syrup.

7. Spread another third of the buttercream on the cake and spread remaining mango cubes on the cake.
8. Then top with the third square of jaconde. Use the remaining honey syrup to wet the jaconde. Spread the remaining buttercream on top of the final layer of jaconde and then refrigerate until very firm (at least half an hour).

9. Make the white chocolate glaze and after it has cooled, pour/spread it over the top of the chilled cake. Refrigerate the cake again to set the glaze.
10. Once set, lightly brush top of the glaze with the green colored apricot glaze. Topped the cake with sliced mangoes and sliced kiwis.
11. Serve the cake slightly chilled. This recipe will yield approximately 20 servings.


As for the leftover jaconde, we assemble 4 layers of jaconde brushed with honey syrup, with slices of kiwis in between of the kiwi and passsionfruit buttercream, and topped off with the white chocolate glaze. The other opera cake to date; a Kiwi Opera Cake! We feasted on this baby and was fully satisfied with the result. The buttercream was creamy and not overly sweet, and we recommend that the Opera Cake should be eaten at room temperature. Or maybe slightly cold.


After a bite out of the Tr'opera Cake (Tropical Opera Cake), we make comparisons and came to a verdict that the Tr'opera Cake tasted way better than the Kiwi Opera Cake. The very sweet and juicy Alphonso mangoes were addictive, which turns out to be the main attraction of the cake. After combining the three tropical fruits; mango, kiwi and passion fruit (which is also Mom's favorite), there was no doubt that the thirst-quencher cake tasted refreshingly luscious, best eaten in hot and humid weather. However, we will definitely increase the amount of whipping cream in the white chocolate glaze as many had told us that the glaze is too sweet. Oh, here goes the meassage; Happy Belated Mom's Day, Mom! And to all mommies out there!